Welcome to a new blog post for this deep dive into the concept of the Grip Circle and its use in motorsport and SimRacing.
Before we begin, let’s start with a brief summary of some previous articles that will help you understand the Grip Circle better.
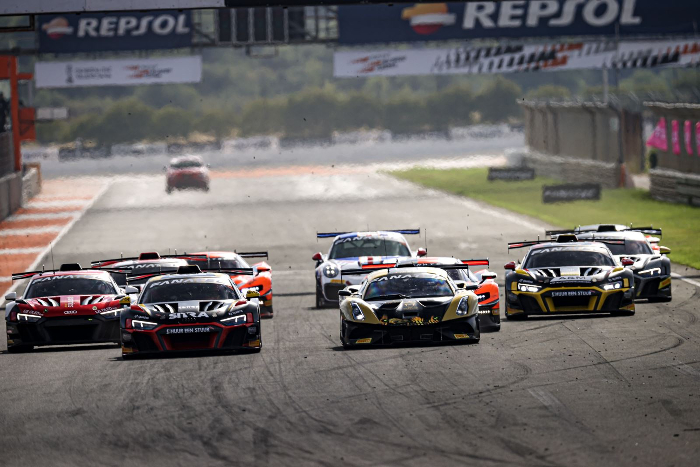
As we've highlighted in past articles, balancing the car is one of the most important yet complex aspects of driving.
We’ve seen how, due to load sensitivity, every time braking, acceleration, or steering causes a weight transfer, there’s a loss of grip.
The goal, therefore, is to minimize this weight transfer by driving smoothly.
The less abruptly you brake, accelerate, or steer, the smoother your driving will be, and the greater the overall grip of the car.
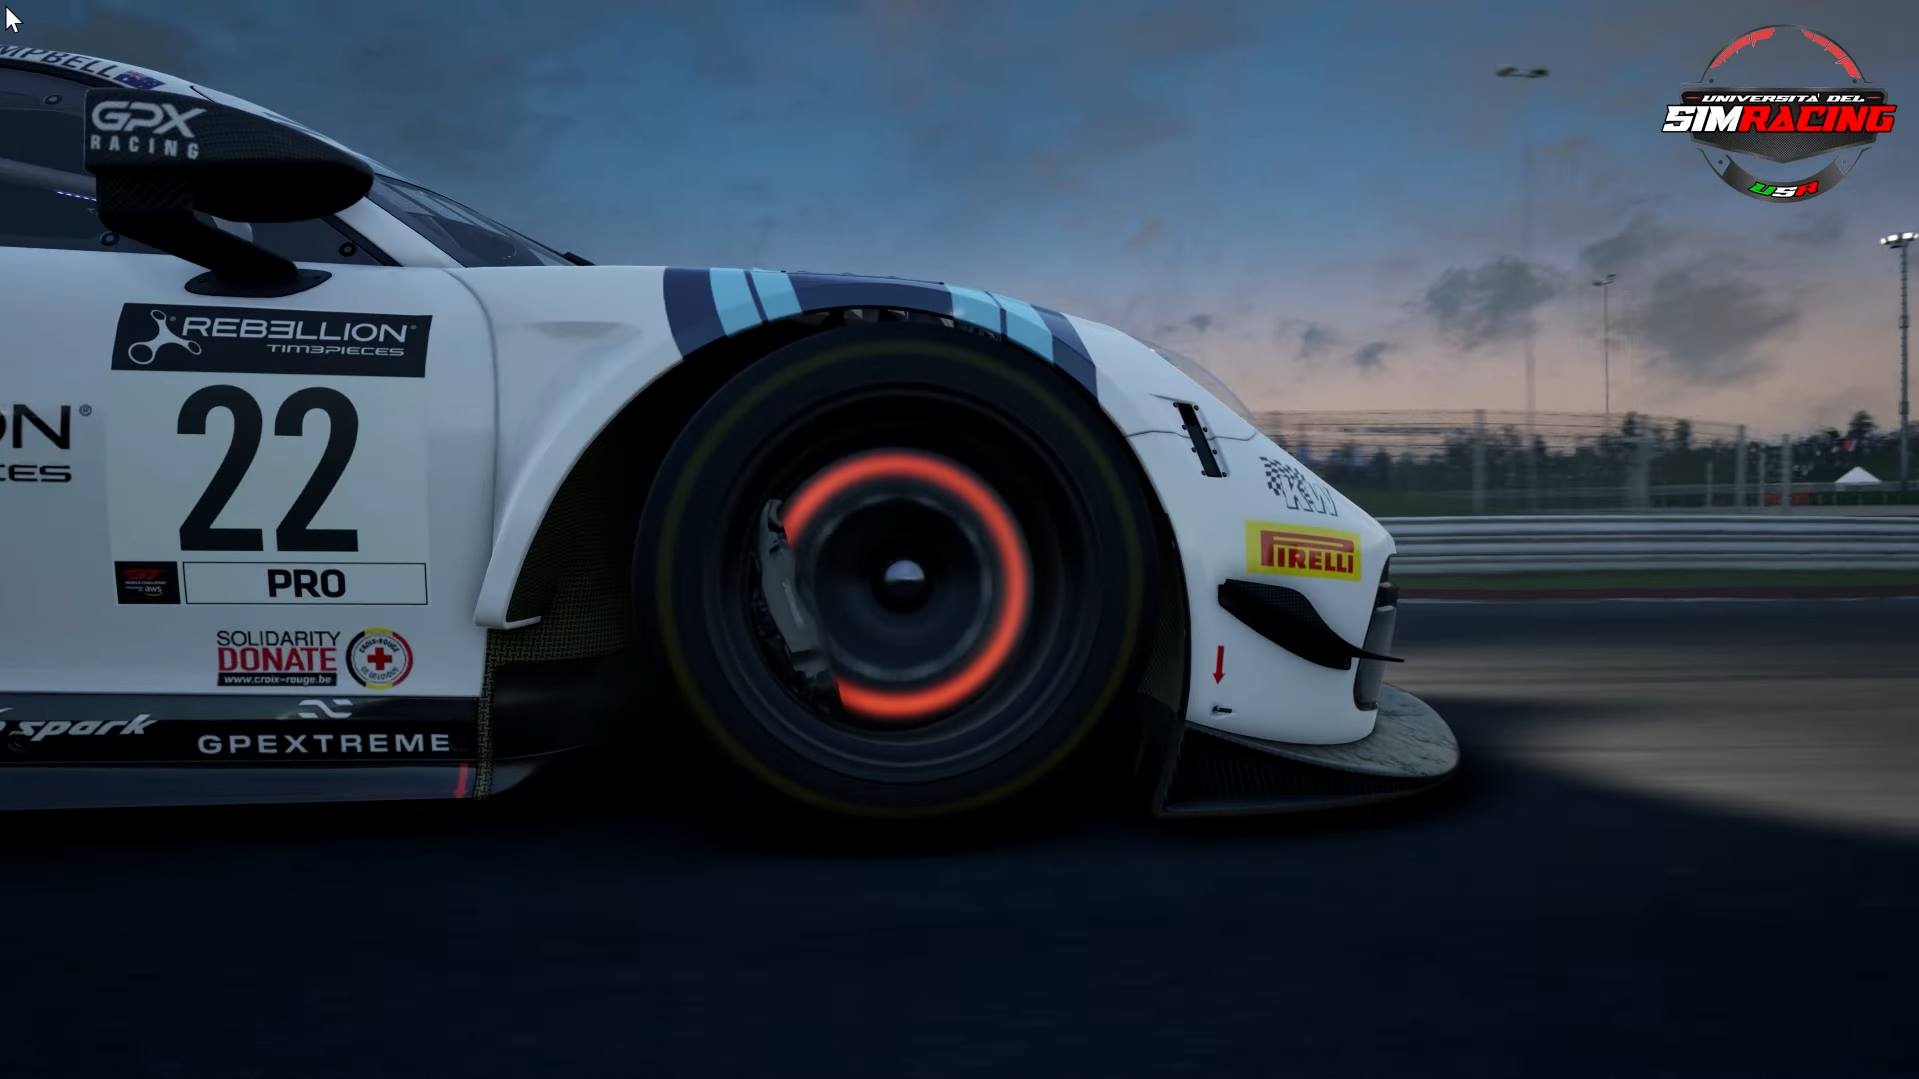
In other words, it’s crucial not to overuse the grip provided by the tires.
This is why it’s important to control the weight transfer through your driving inputs.
You need to keep your driving as smooth and flowing as possible because, for example, if you turn the wheel sharply in a corner...
...the weight will shift immediately to the outside, reducing the total traction in a fraction of a second.
You have to wait for the car to stabilize and balance again before you can take the corner at the limit and accelerate out of it.
Driving in an opposite, erratic, and unnecessarily aggressive manner would only lead to lost time on your lap.
Essentially, being smoother means being faster on the track.

Remember, every tire has a specific amount of grip.
It would be great if, the more vertical load we add to the tire, the more grip we get without any downsides, endlessly.
But the reality is that every tire has a load-bearing limit, and exceeding that limit will cause the car to lose control, either skidding or sliding.
Driving smoothly increases the likelihood of staying within the tire's grip limit, as a tire can reach a higher adhesion limit if this is achieved gradually.
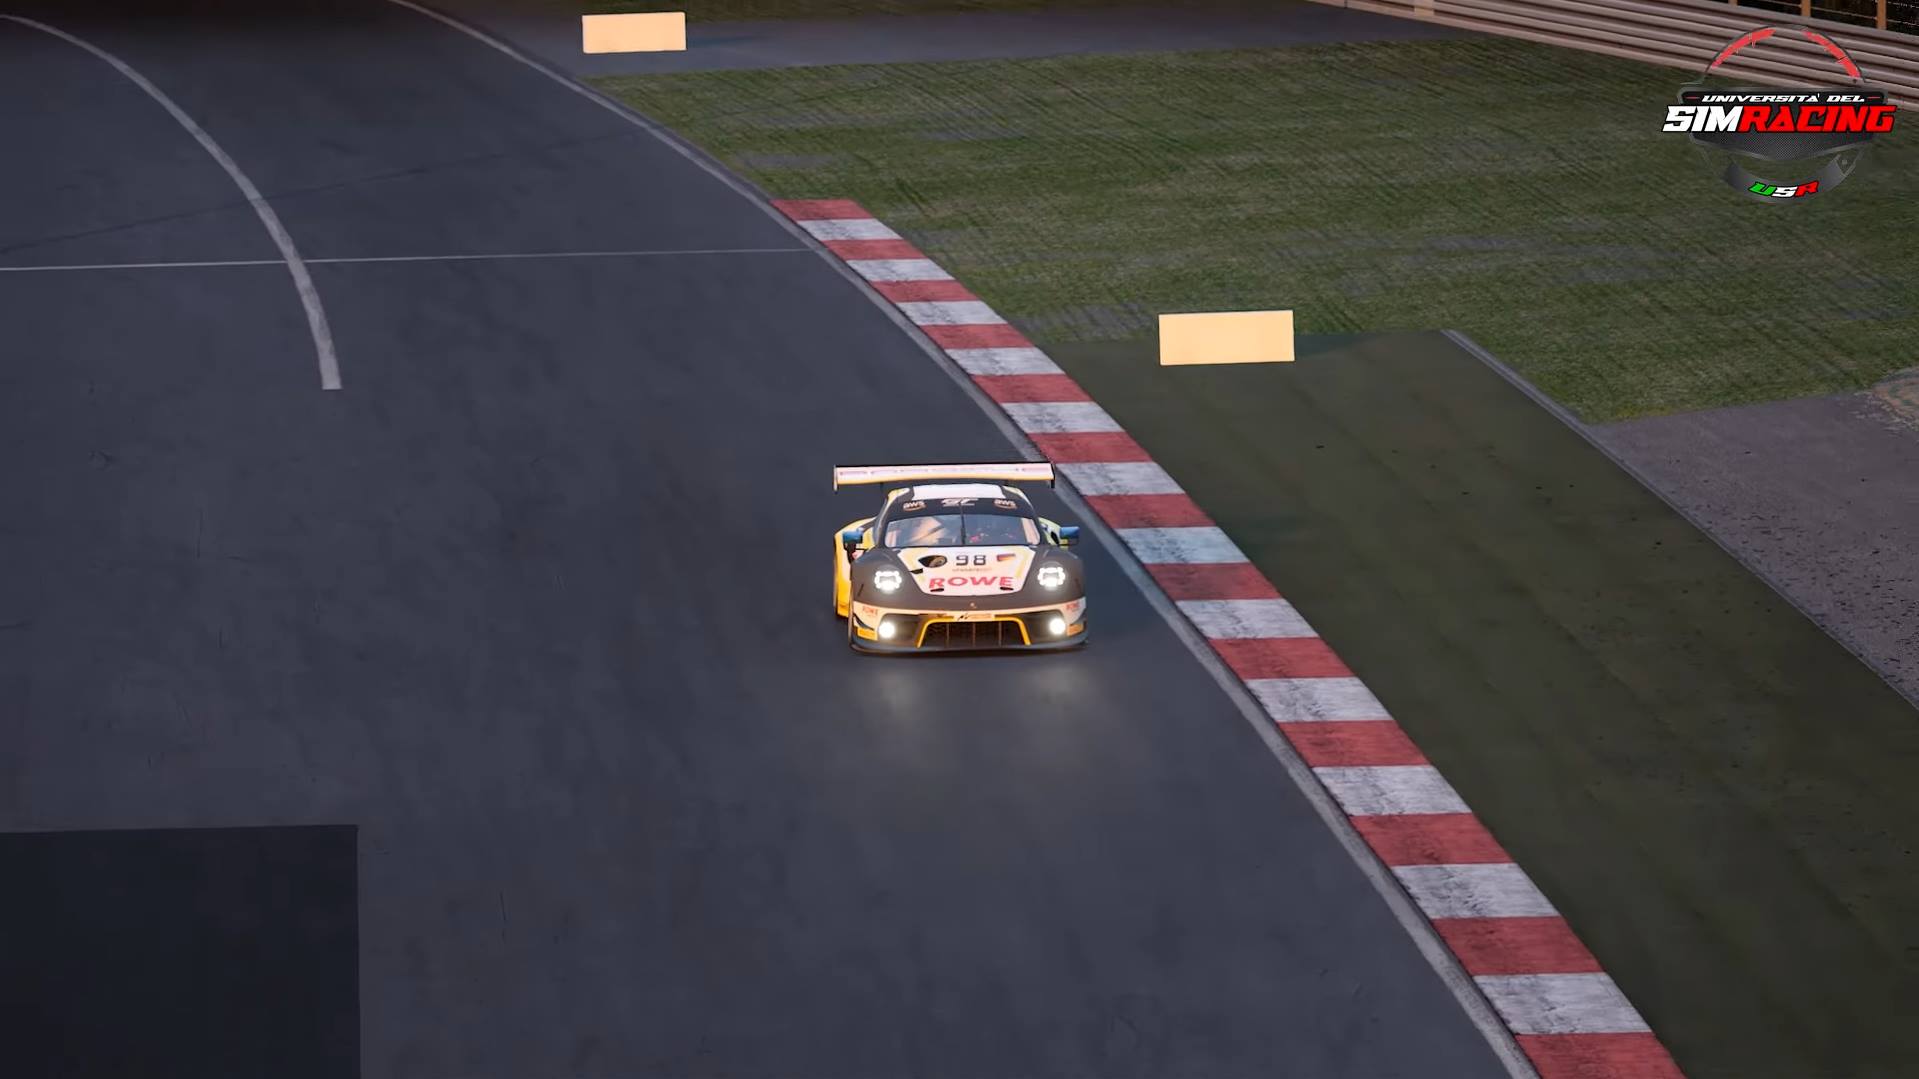
For example, if you take a corner with a sharp steering movement or brake suddenly in a panic...
...you don’t allow the tires to develop their adhesive grip forces gradually, making it difficult to maintain grip on the track.
As a result, you’ll find yourself fighting against a skid or slide.
A tire's grip limit can be compared to the force needed to break a rope.
If you pull the end of the rope gradually and gently, it will take a lot of force to break it.
However, if you make a quick and abrupt movement, the rope will break with much less effort.
This analogy applies to a tire's grip limit: the more slowly you build up the tire’s grip limit in a corner, the more overall grip they can generate.
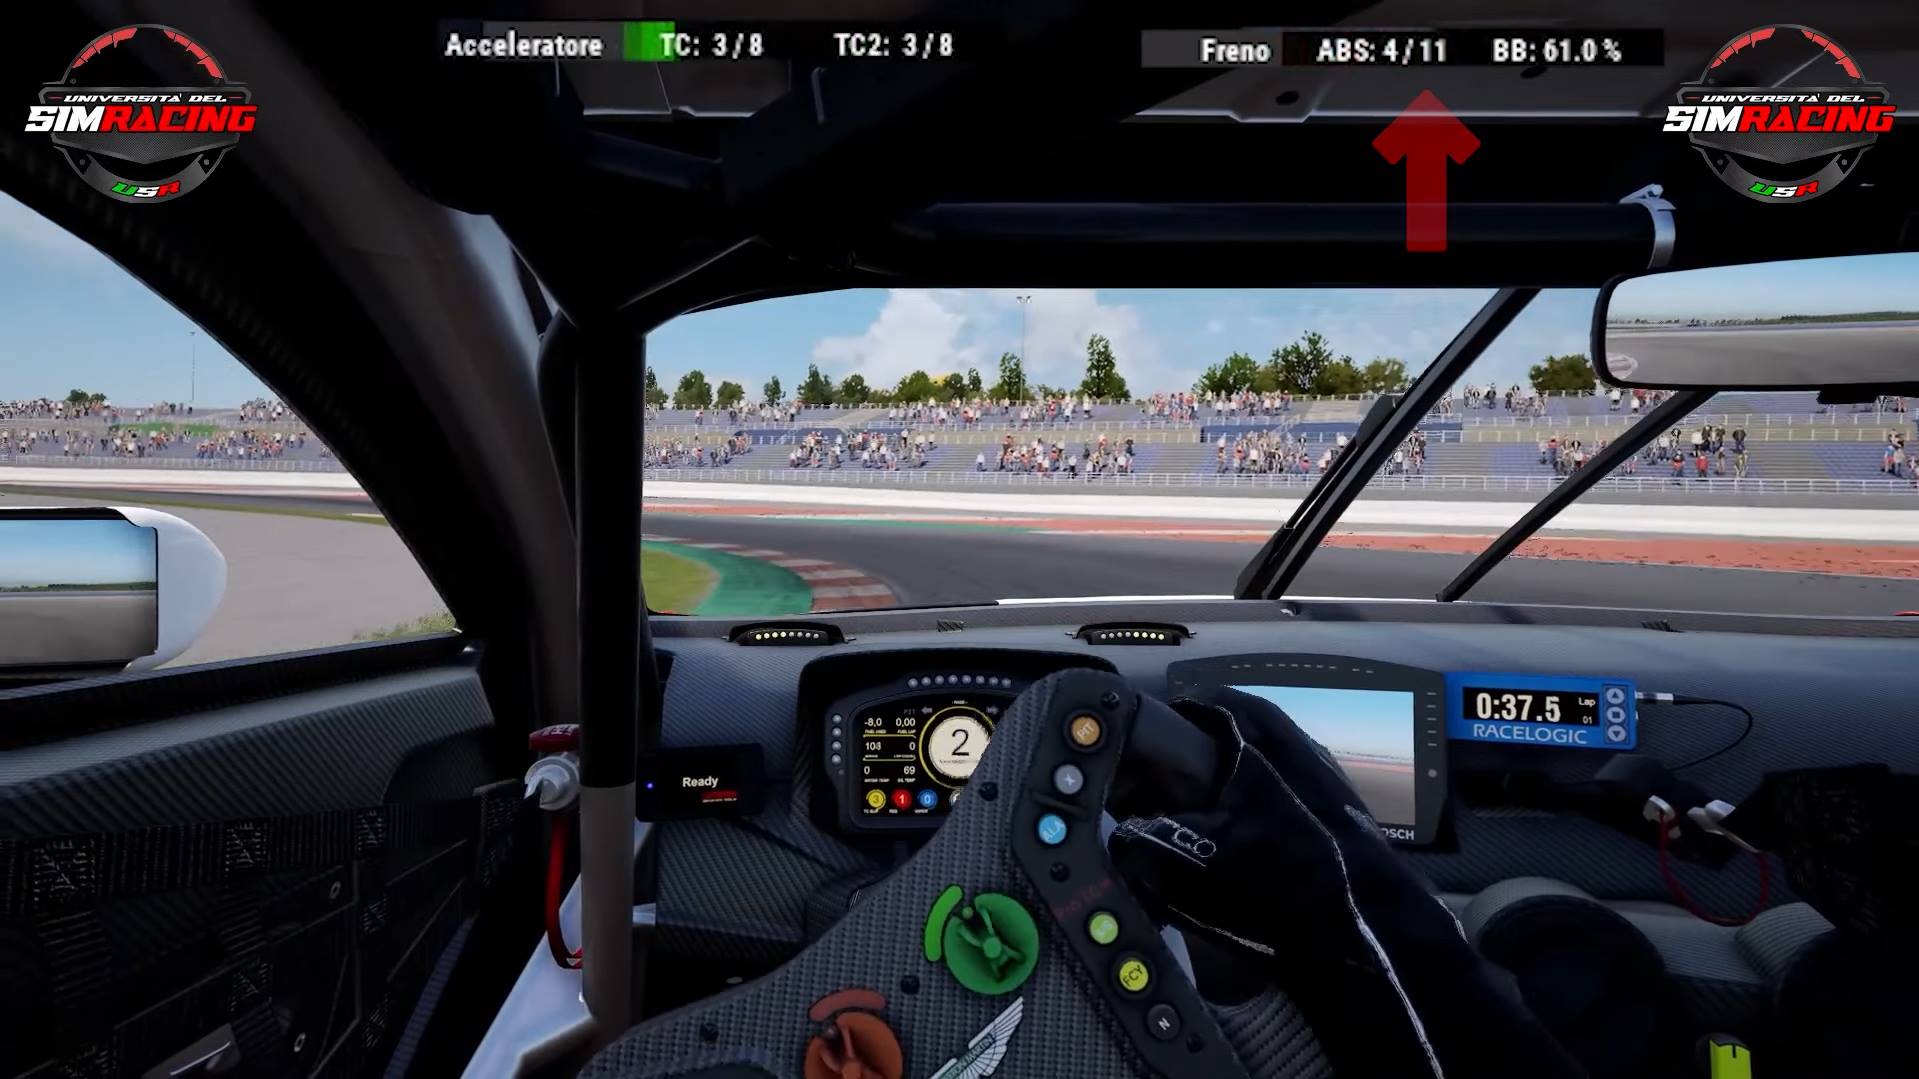
Every action you take should be executed smoothly.
When taking a corner, it’s crucial to turn the steering wheel as gently and slowly as possible.
Smoothness in driving is more important than speed itself; speed will naturally increase with practice.
Trying to drive fast before you’ve learned to be smooth is a mistake.
You won’t achieve maximum speed without first mastering smoothness in your driving.
Let speed grow naturally and progressively, because the slower and smoother your maneuvers, the more control you’ll have, and consequently, the faster your car will be able to go.
And in relation to smooth driving, let’s now analyze and delve into one of the most profitable yet difficult techniques to master: Trail Braking.
Trail Braking is a braking technique that involves maintaining the braking phase while beginning the turn.
In practice, it means continuing to brake as you start to steer.
This technique clearly has a specific purpose, which we’ll now look at in detail.
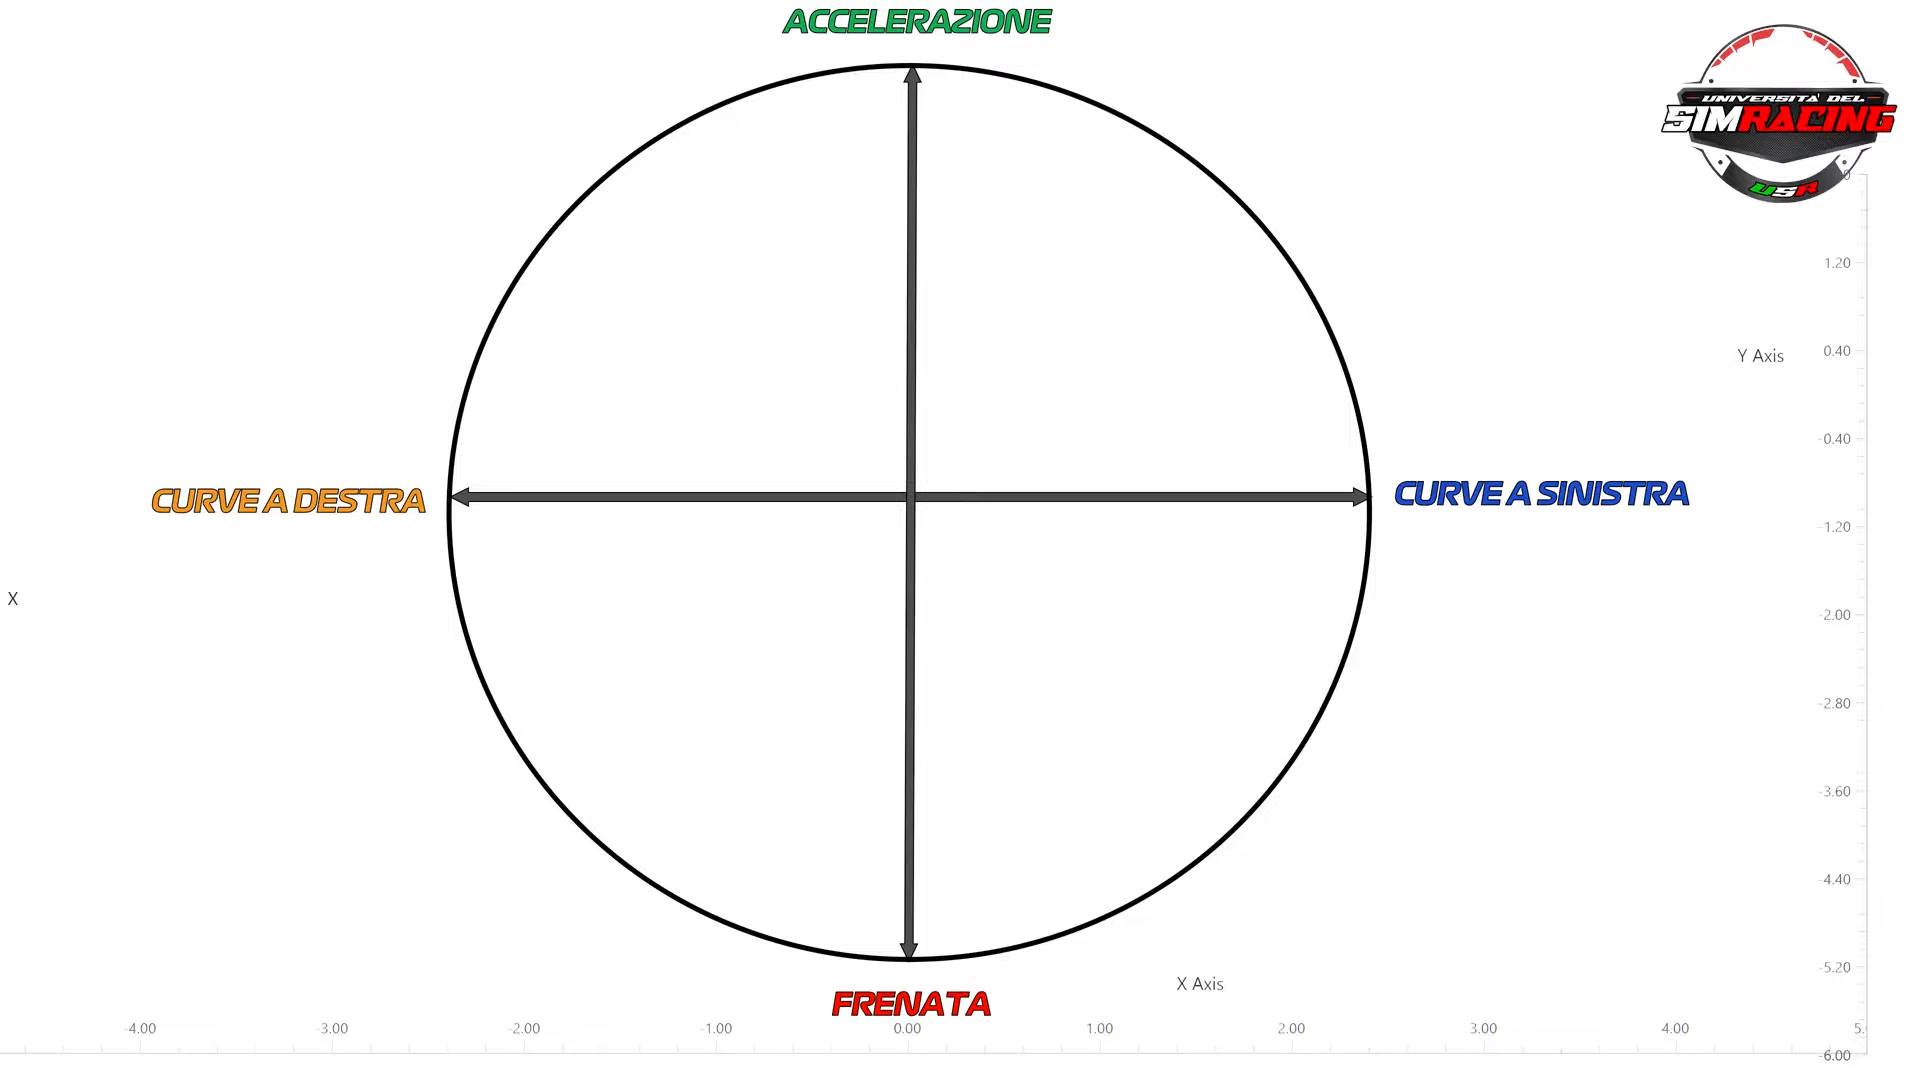
Thanks to the Grip Circle, a simple and visual method to represent a driver’s performance on track, we can better understand this technique.
Essentially, the Grip Circle is an XY (Cartesian) graph generated by a data acquisition system that records the G-forces experienced by the car during driving on track.
The unit of measurement used is G-force, which is the acceleration relative to Earth’s gravity.
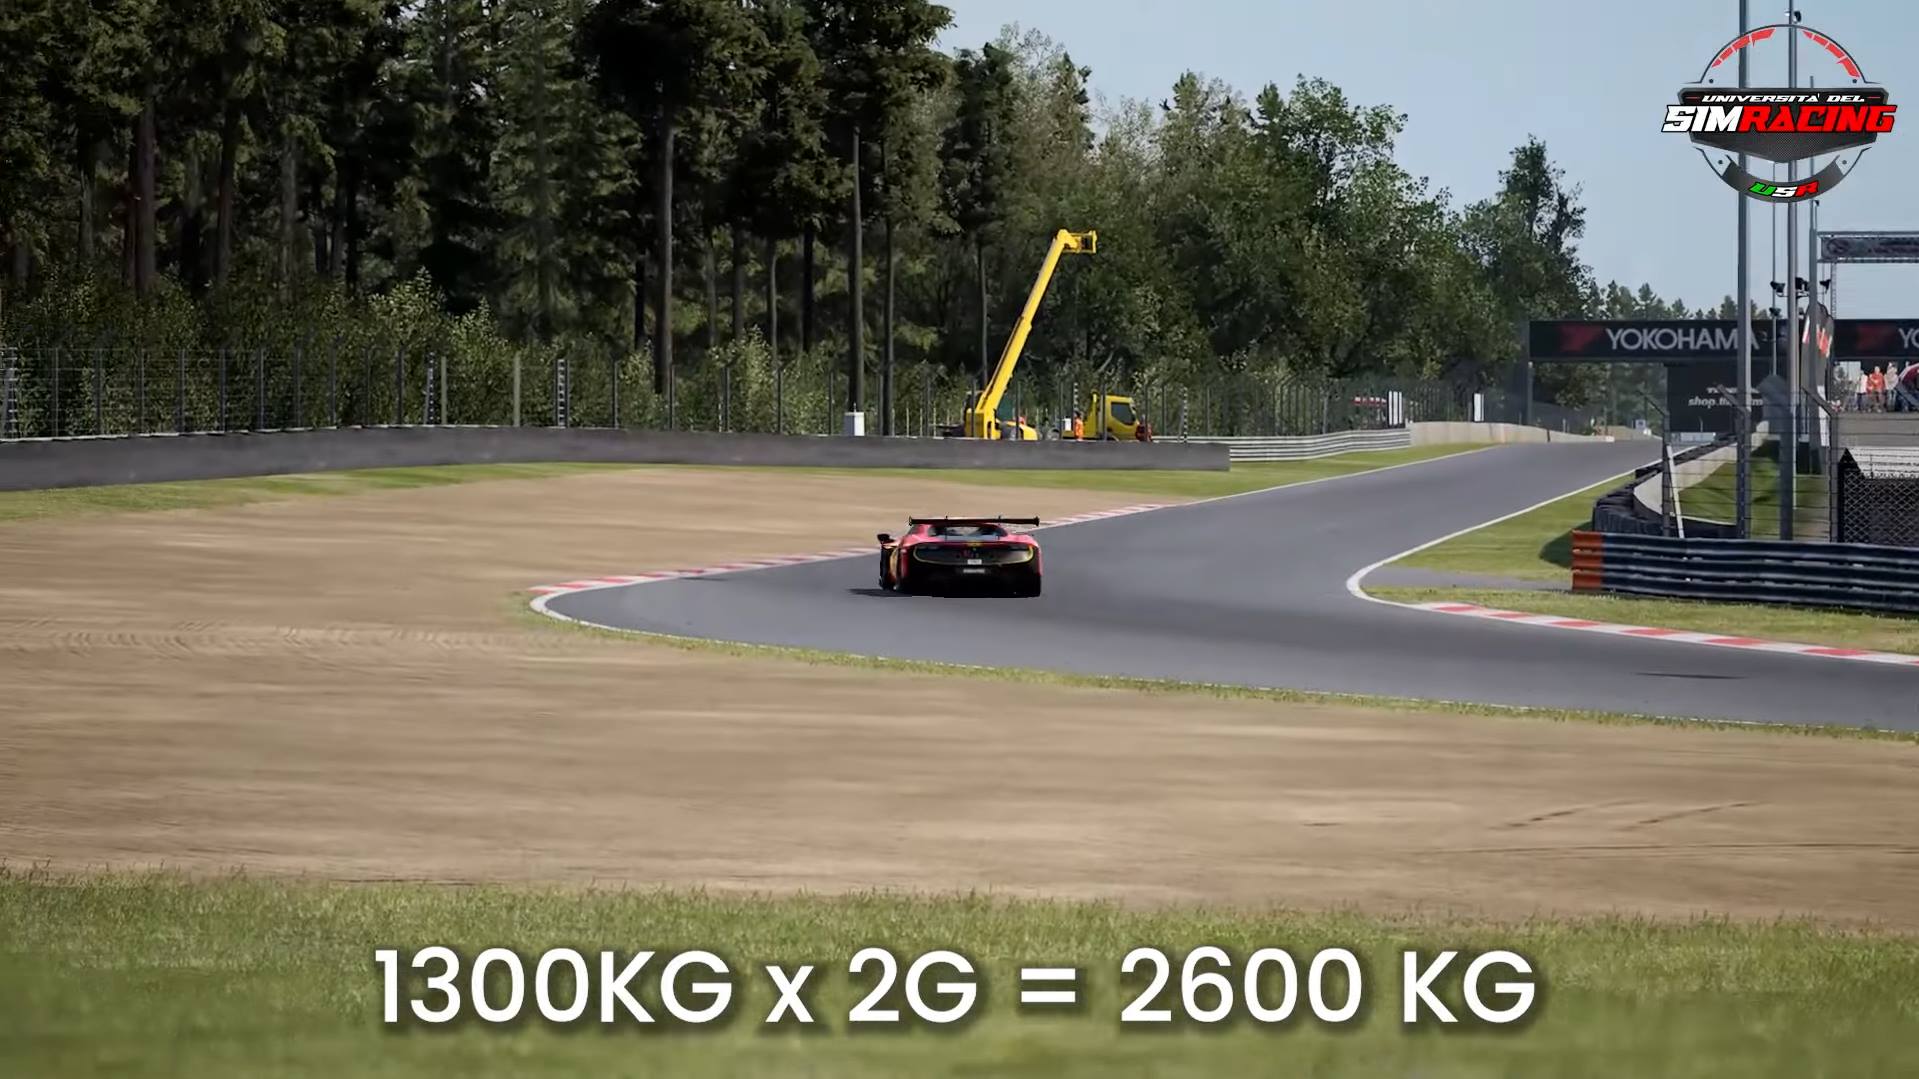
For example, if a car weighs around 1300 kg, like the new Ferrari 296 GT3, and takes a corner with a force of 2G, there is a centrifugal force of 2600 kg pushing the car outward.
Consider that a tire has relatively similar adhesion limits in every direction, be it braking, cornering, or accelerating, let’s assume 2G.
In other words, the car and tire together are capable of braking at 2G, cornering at 2G, and accelerating at 2G, before the tires themselves lose grip and start to slide.
In fact, it means that exceeding this adhesion limit will slow you down or, in case of loss of control, result in a spin.
But similarly, it means that if you don’t fully exploit the available grip of the tires, your speed will still be lower.
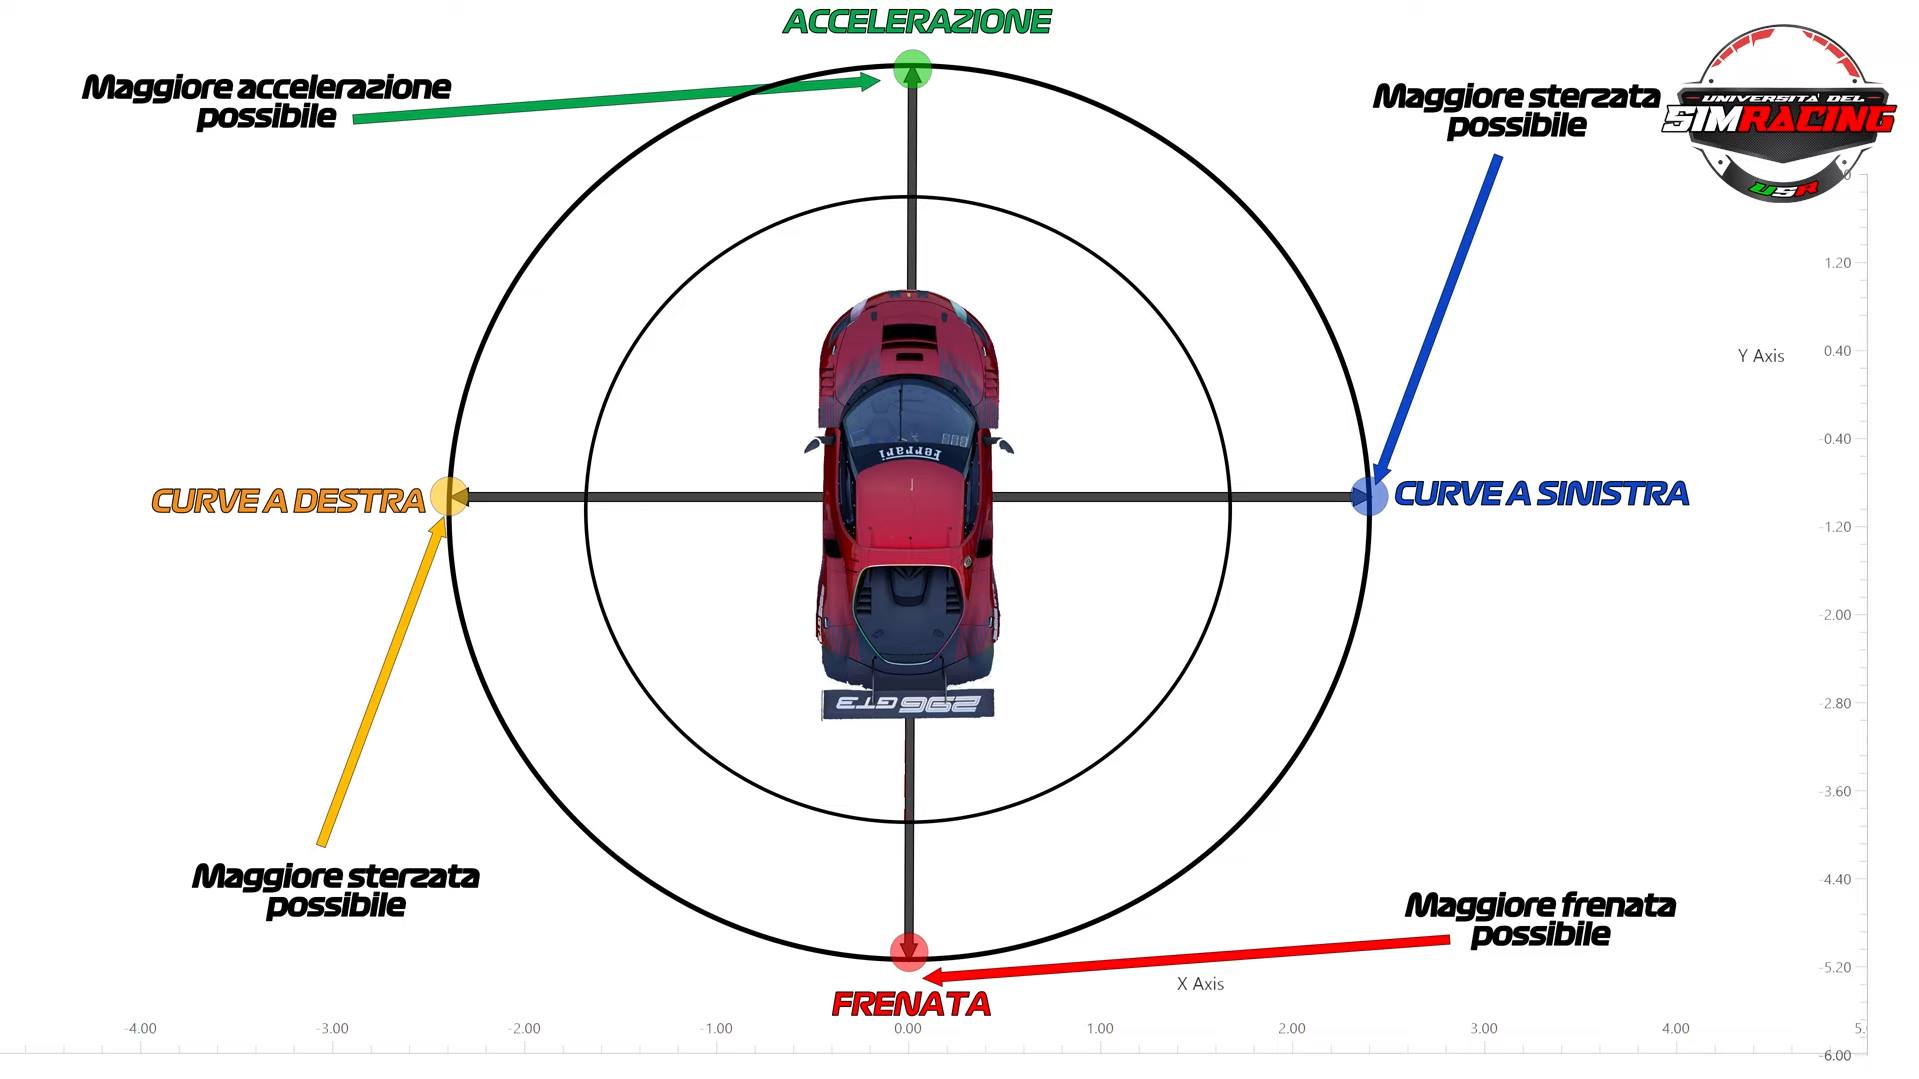
In essence, the Grip Circle represents a graphical visualization of the maximum adhesion limit that a car can generate.
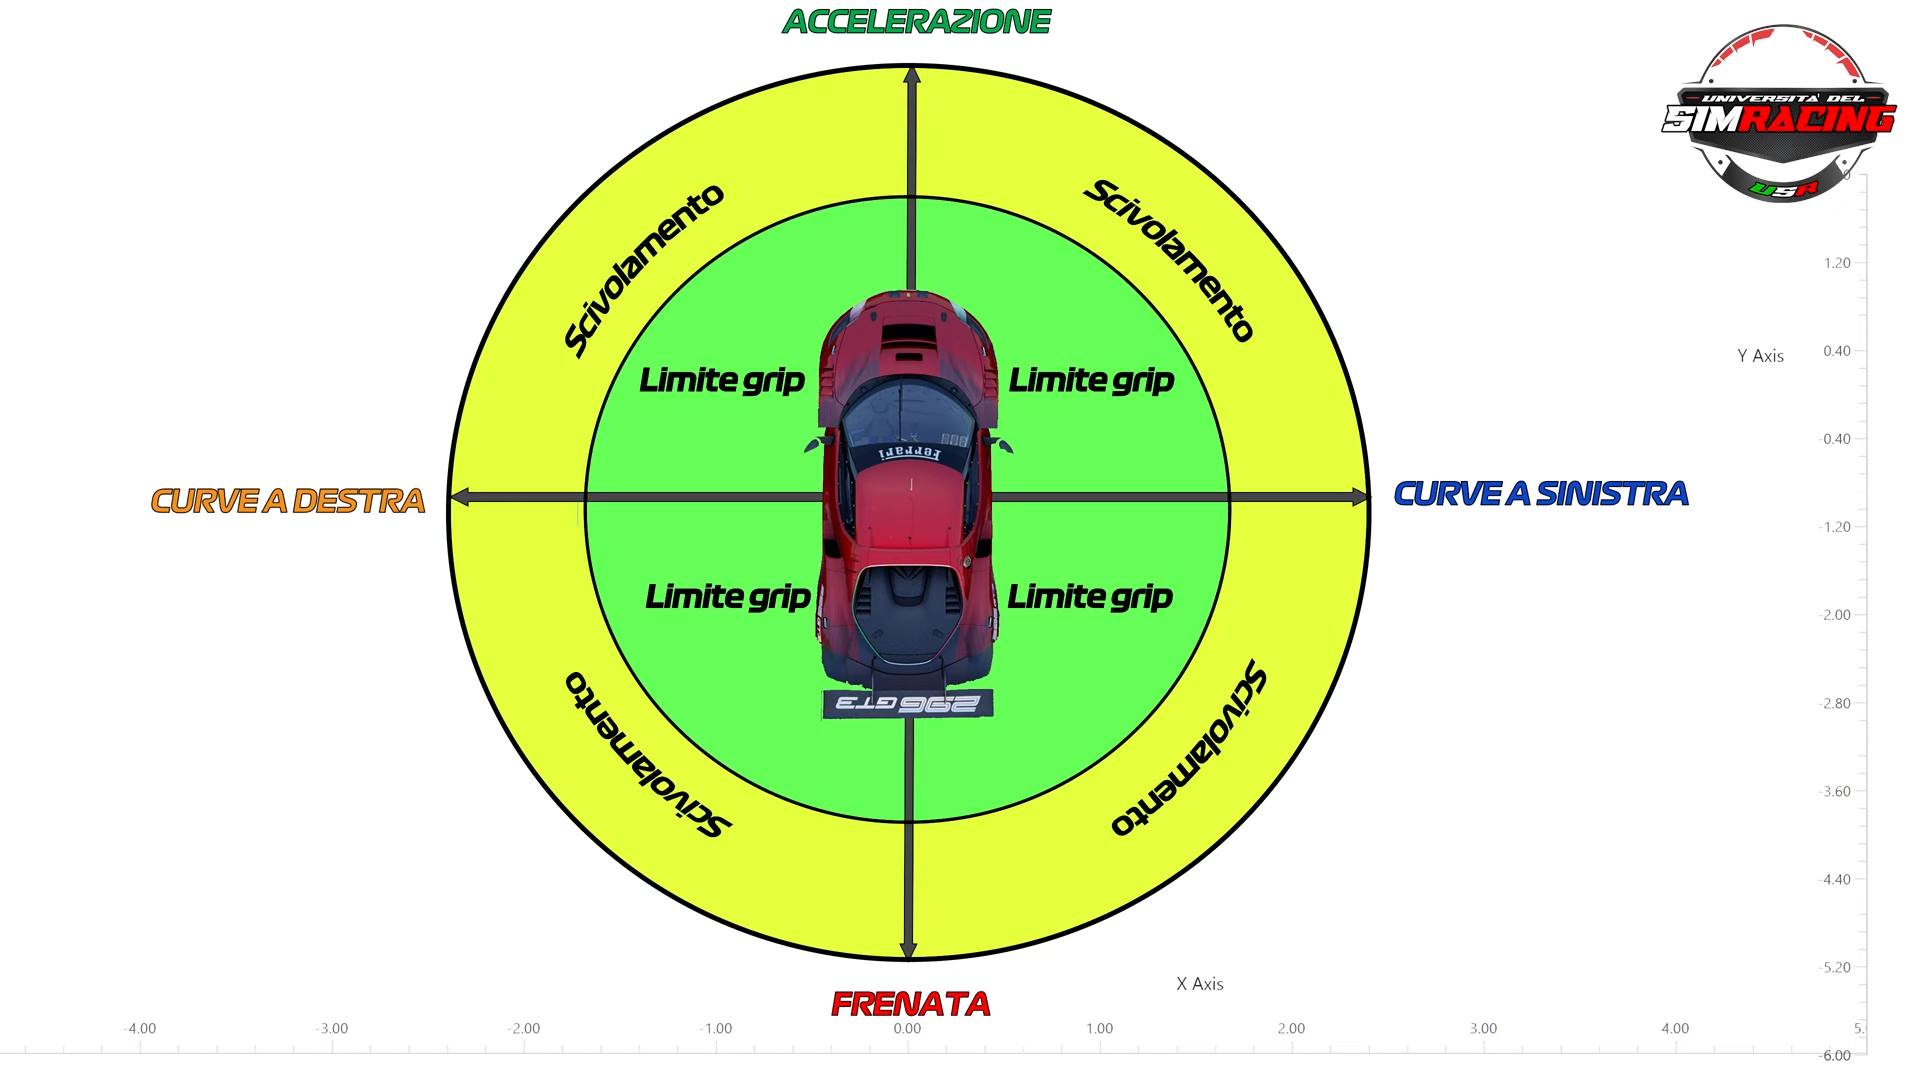
Imagining placing the car at the center of an XY graph, the circle drawn around the car symbolizes the maximum available grip of the tires.
Where the circle intersects the positive Y-axis, you have the point of maximum acceleration of the car...
...while the point where the circle intersects the negative Y-axis indicates the maximum braking point.
Similarly, the point where the circle cuts the negative X-axis corresponds to the maximum right steering point and where it intersects the positive X-axis indicates the maximum left steering point.
Any point within this circle indicates that the car still has grip; outside of it, the car is sliding.
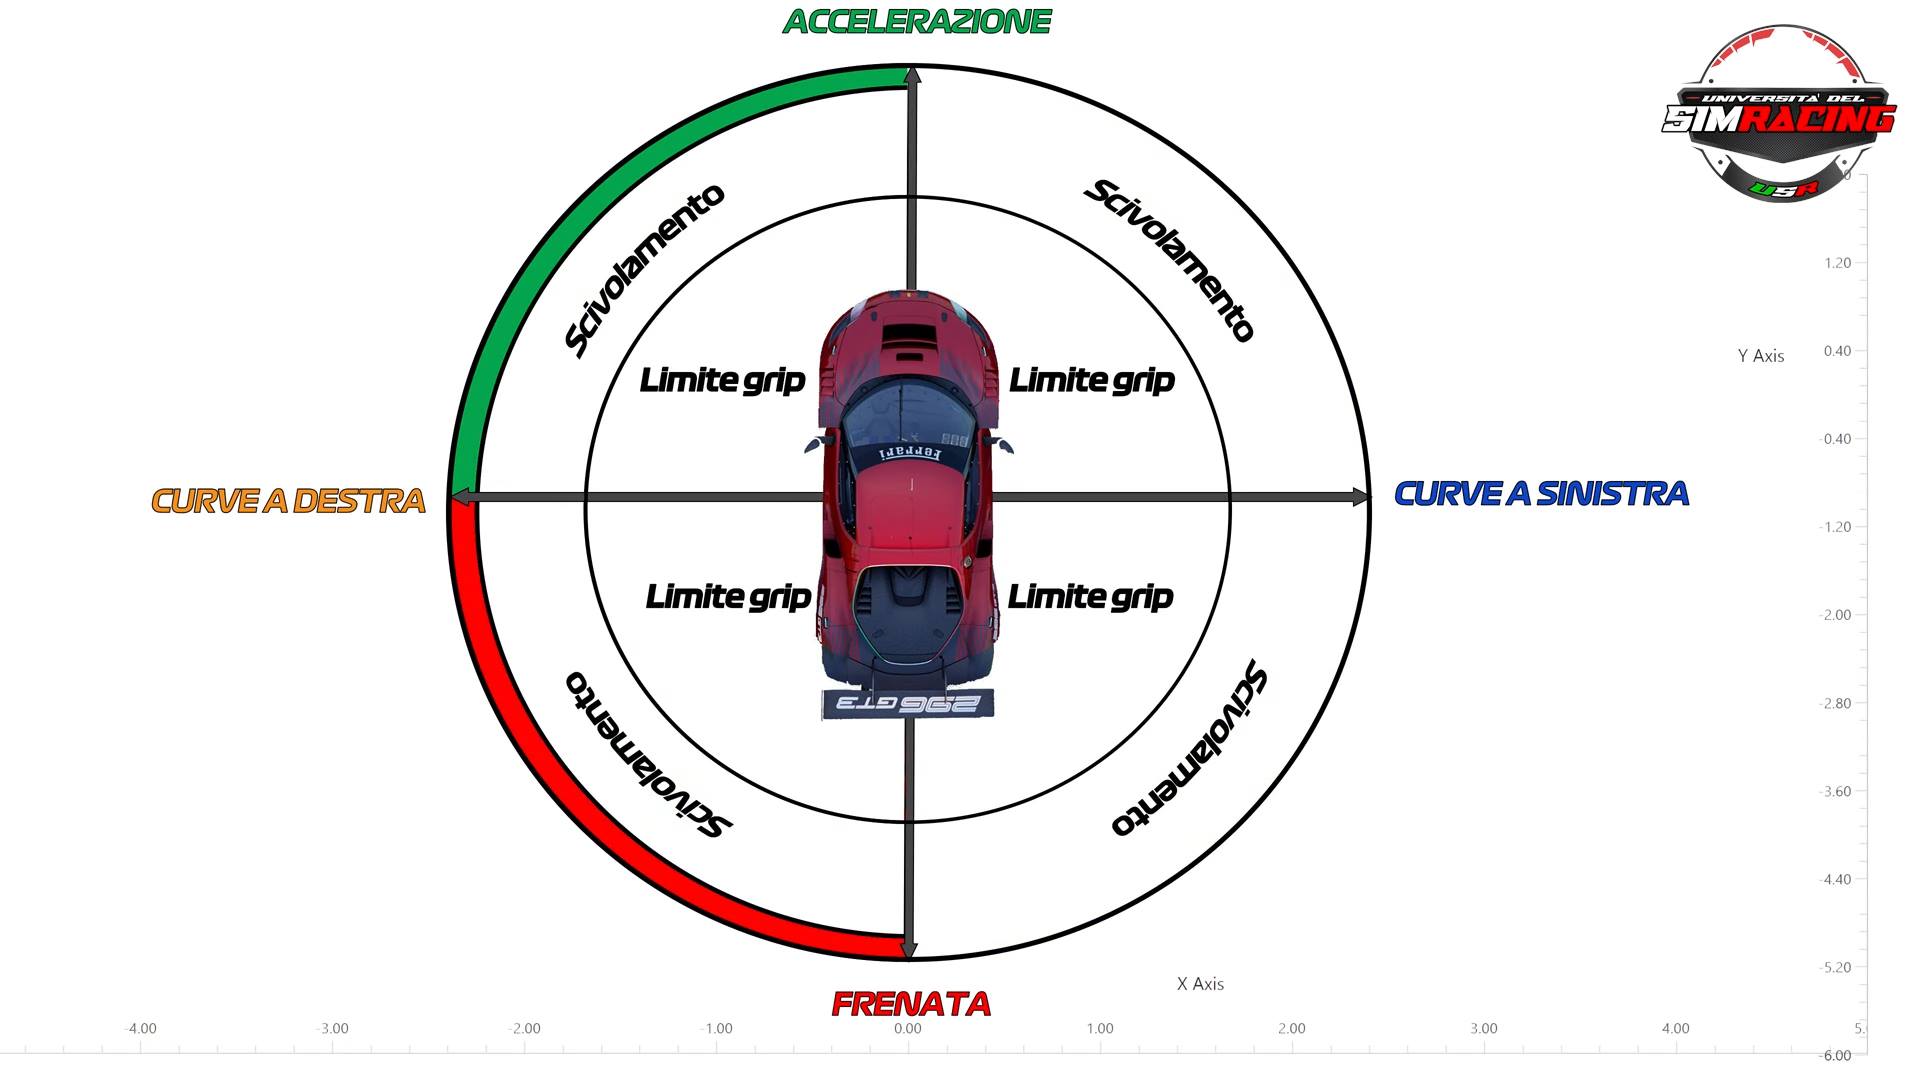
However, it should be noted that a certain degree of sliding is considered acceptable when driving at high speed.
A small percentage of slip, generally between 5 and 8%, is actually conducive to lap times.
In a unidirectional situation such as full braking, this concept is relatively simple to visualize.
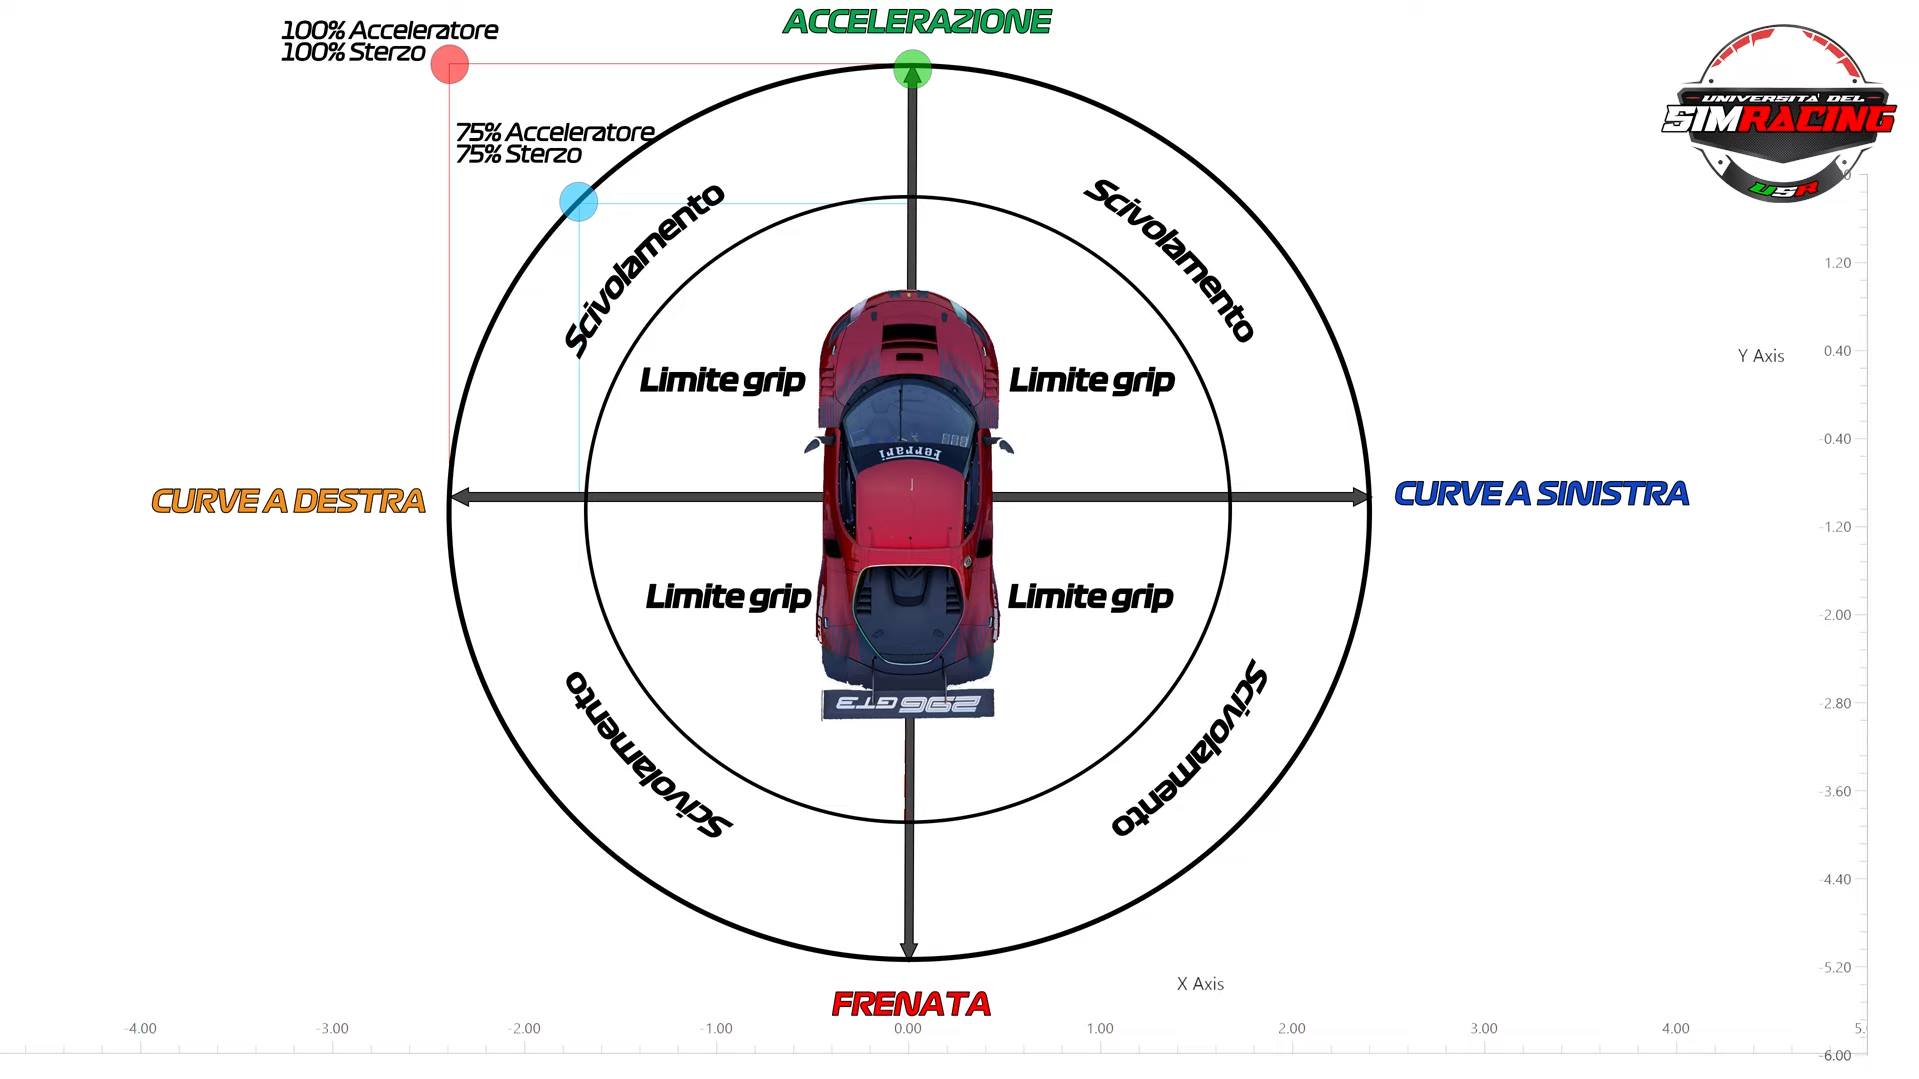
However, things become more complicated when combining actions like steering left or right with accelerating or braking.
It is not possible to simultaneously use 100% of the accelerator and 100% of the steering, for example, because extending the lines to their intersections would take you outside the Grip Circle.
If, however, you partially use the gas or brake and the steering wheel, then you can understand how much of each input you can use simultaneously.
This becomes particularly interesting in situations close to the extreme limits.
If you are at the maximum limit in a corner, any addition of acceleration or braking will exceed the adhesion limit, causing a loss of control.
But if the steering wheel is not fully turned and therefore requires less force in the corner, there is room to increase the percentage of usable throttle.
In braking, on the other hand, you can brake at 100% in a straight line...
...but when you start to steer you need to reduce the brake pressure in proportion to the amount of steering required.
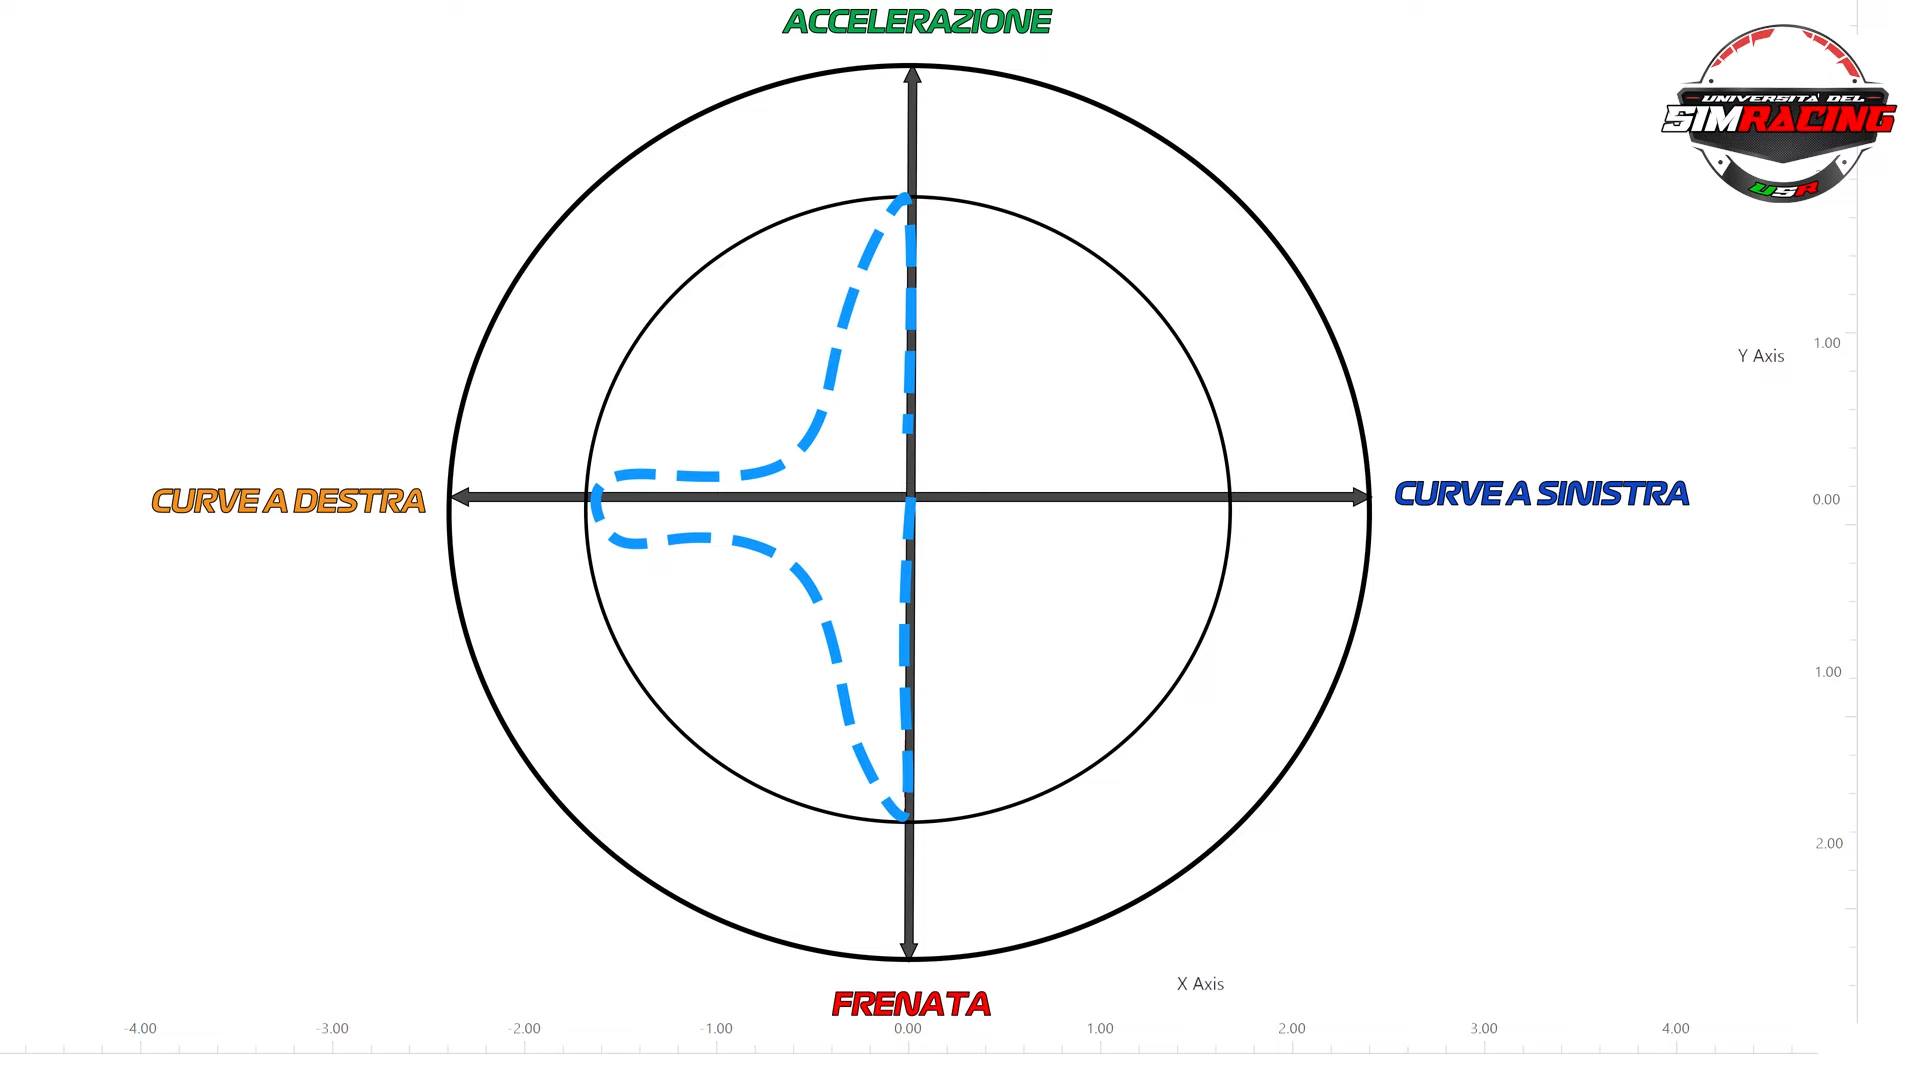
Using proper driving technique, the trajectory on the graph will tend to follow the Grip Circle, indicating that you are using the full potential of your tires.
Let’s take an example with two drivers who have to tackle a right-hand corner, transitioning from one directional force to another, such as from braking to turning.
There are two methodologies to transition from one type of traction to another.
One option is to release the brakes abruptly as soon as the braking phase ends, where you were braking at 2G, and then steer to take the corner, reaching up to 2G of lateral force.
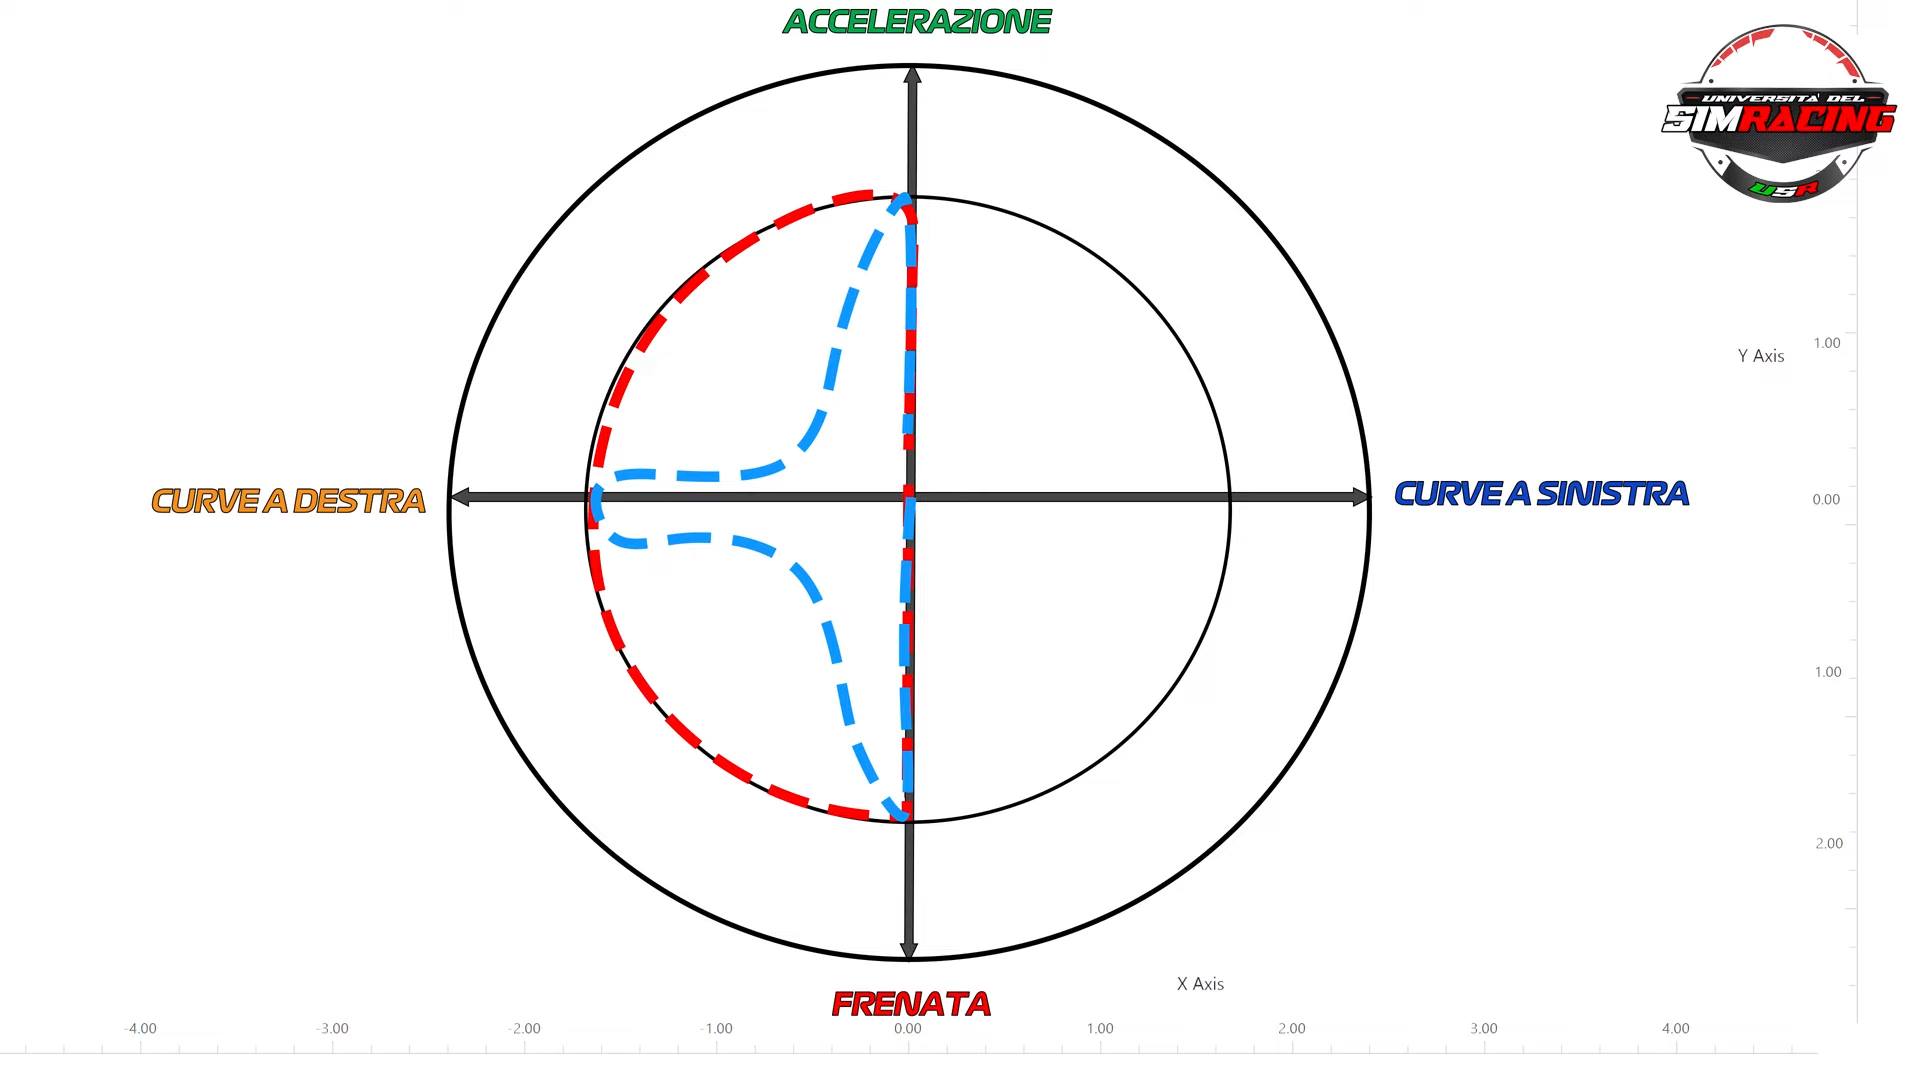
The alternative is to gradually release the brakes while simultaneously increasing the steering angle so that the two actions overlap in the approach to the corner.
This latter method is known as Trail Braking.
In the first case, the car, for a brief moment, even just a fraction of a second, is not fully utilizing the tires.
Not being used to their full potential, this will cause a loss of time, however minimal, as the car cannot immediately transition from straight-line braking to corner entry.
In contrast, in the second scenario, the driver is making full use of the grip offered by the tires, managing to keep the car at the outer limit of the Grip Circle graph, allowing for much faster driving.
This approach also favors the generation of optimal grip forces, as these forces are built up, which in turn, increase cornering speed.
The goal, as indicated by the Traction Circle and illustrated graphically, is to gradually reduce brake pressure while entering the corner, Trail Braking.
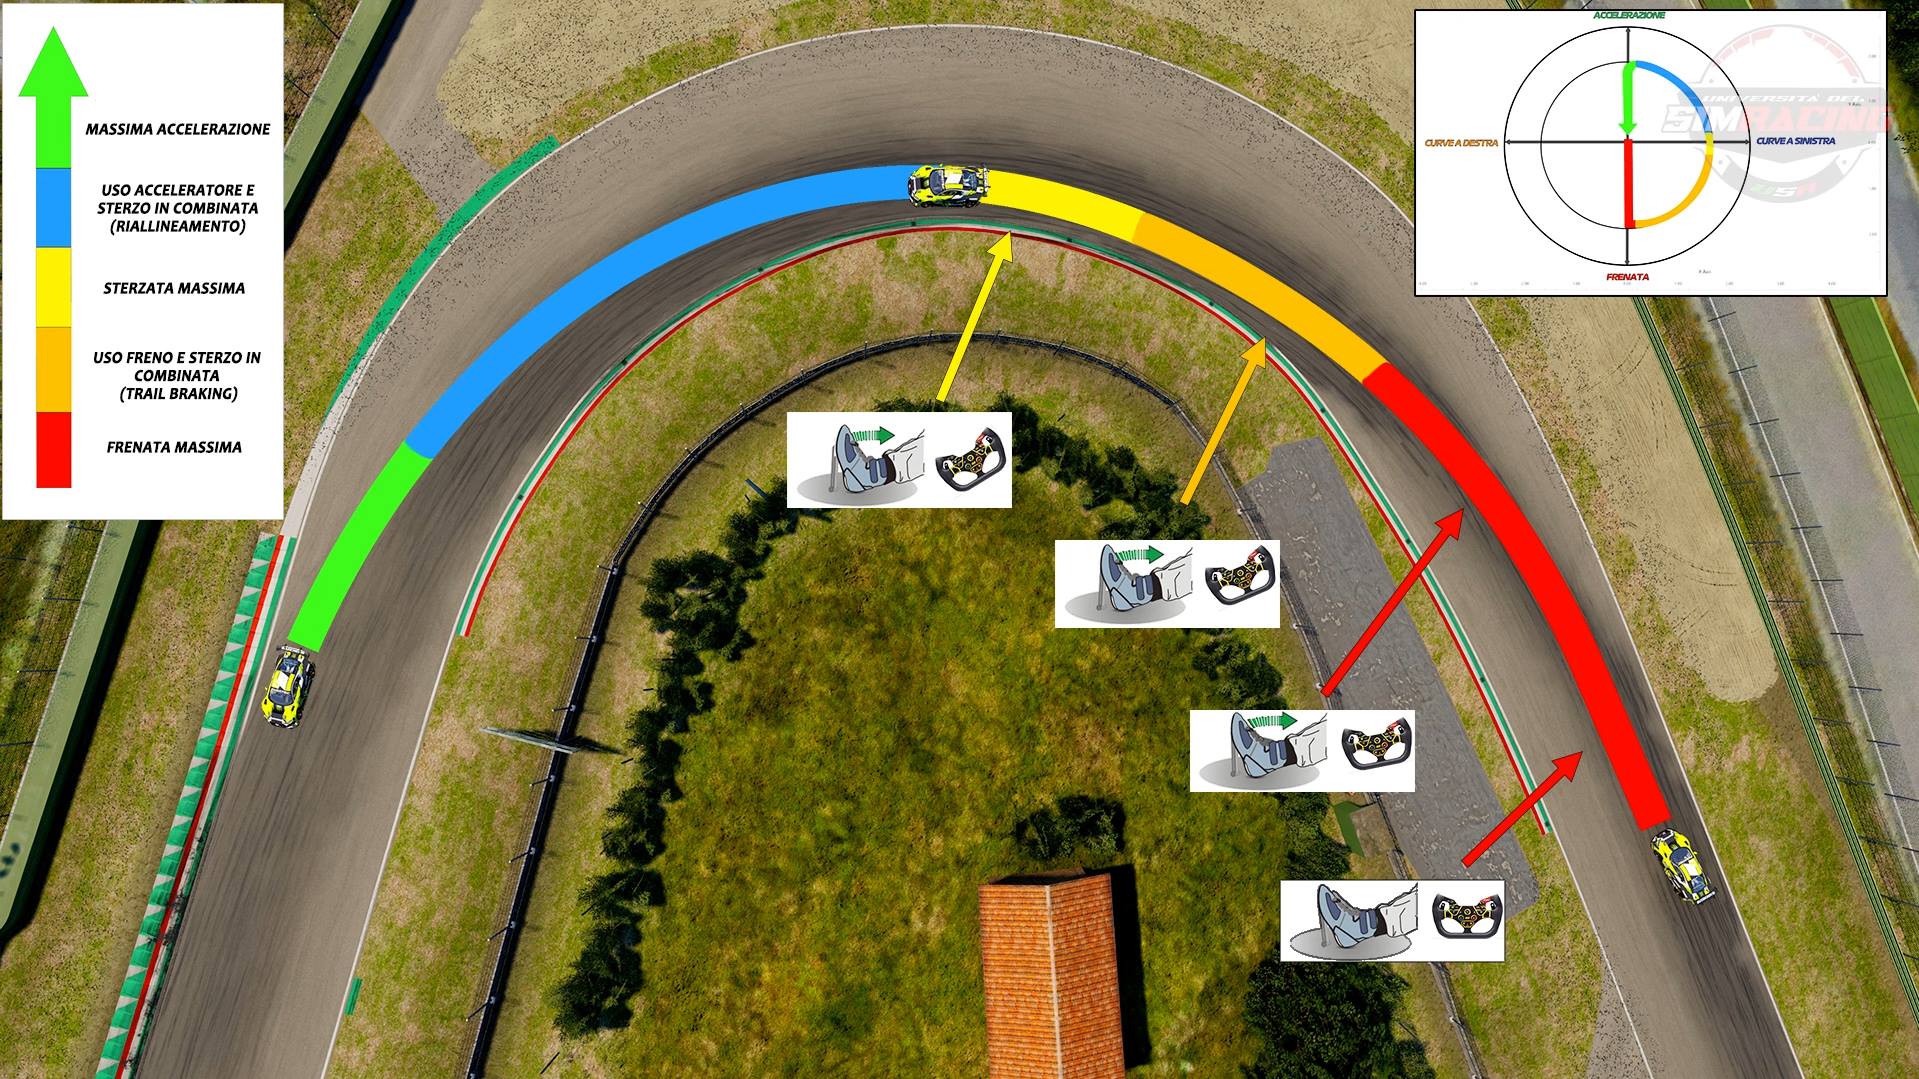
In practice, it means braking at 100% of the traction limit, 2G in our example, along the straight until approaching the corner, then starting to release the brakes while beginning to steer.
This way, you progressively trade off some of the braking force with the force required for corner entry:
90% braking, 10% cornering; 75% braking, 25% cornering; and so on, until reaching the cornering limit, using 100% of the available grip at 2G.
As the cornering trajectory becomes more direct, freeing the car as soon as possible, you prepare the tires for the acceleration phase:
90% cornering, 10% acceleration; 75% cornering, 25% acceleration; 50% cornering, 50% acceleration; and so on.
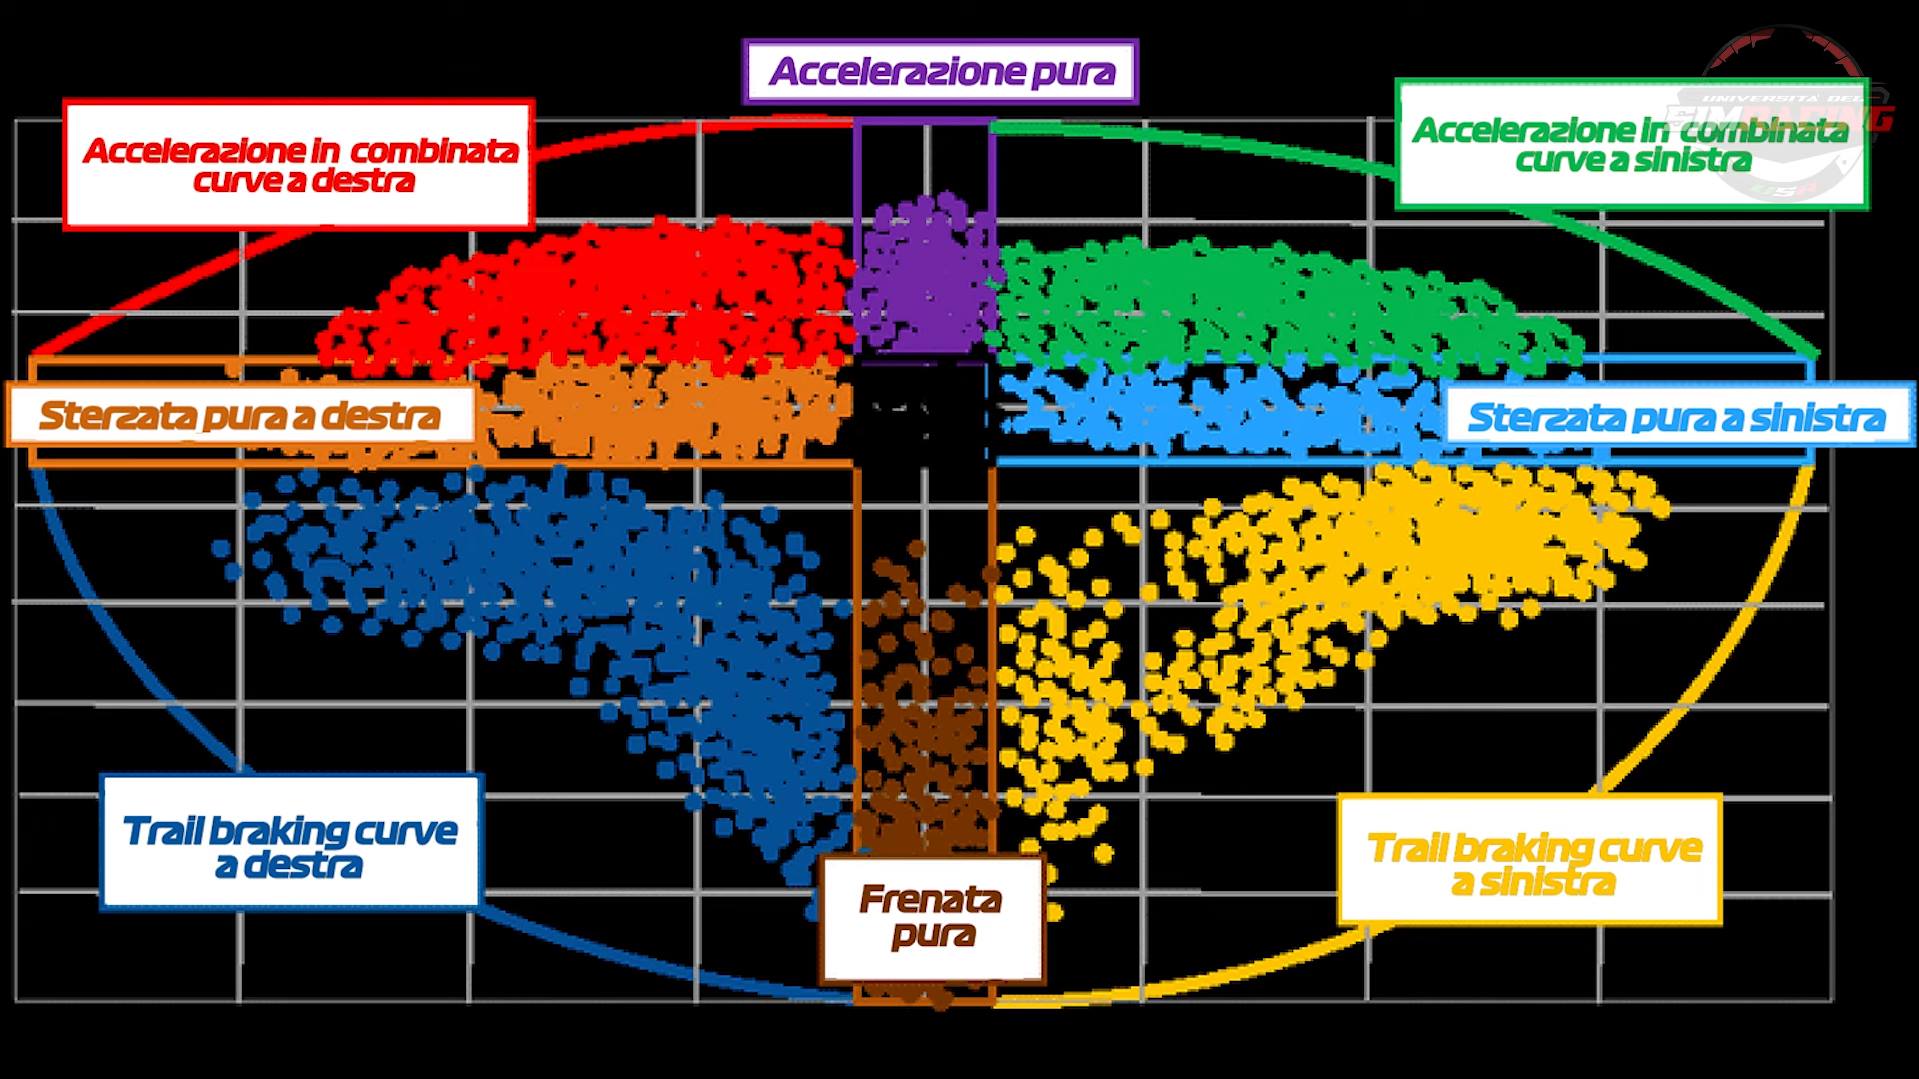
To learn how to read and interpret the telemetry data provided by the Grip Circle, we can help ourselves with this image, dividing a hypothetical one into colored zones.
Starting from the top, we have colored in purple the Pure Acceleration zone, which is when we are just giving gas in a straight line.
Then, in green, we have the combined acceleration phase, which is the use of the throttle and steering when exiting left-hand corners.
Next, in light blue, is the pure cornering zone, which is when we are only using the steering wheel to turn left.
In yellow, we have the Trail Braking zone, which is when we are using both the brake and the steering for left-hand corners.
Finally, in brown, we have the pure braking zone, which is when we are only using the brake pedal for a violent straight-line stop.
Completing the circle, quite literally, are the mirrored zones for right-hand corners.
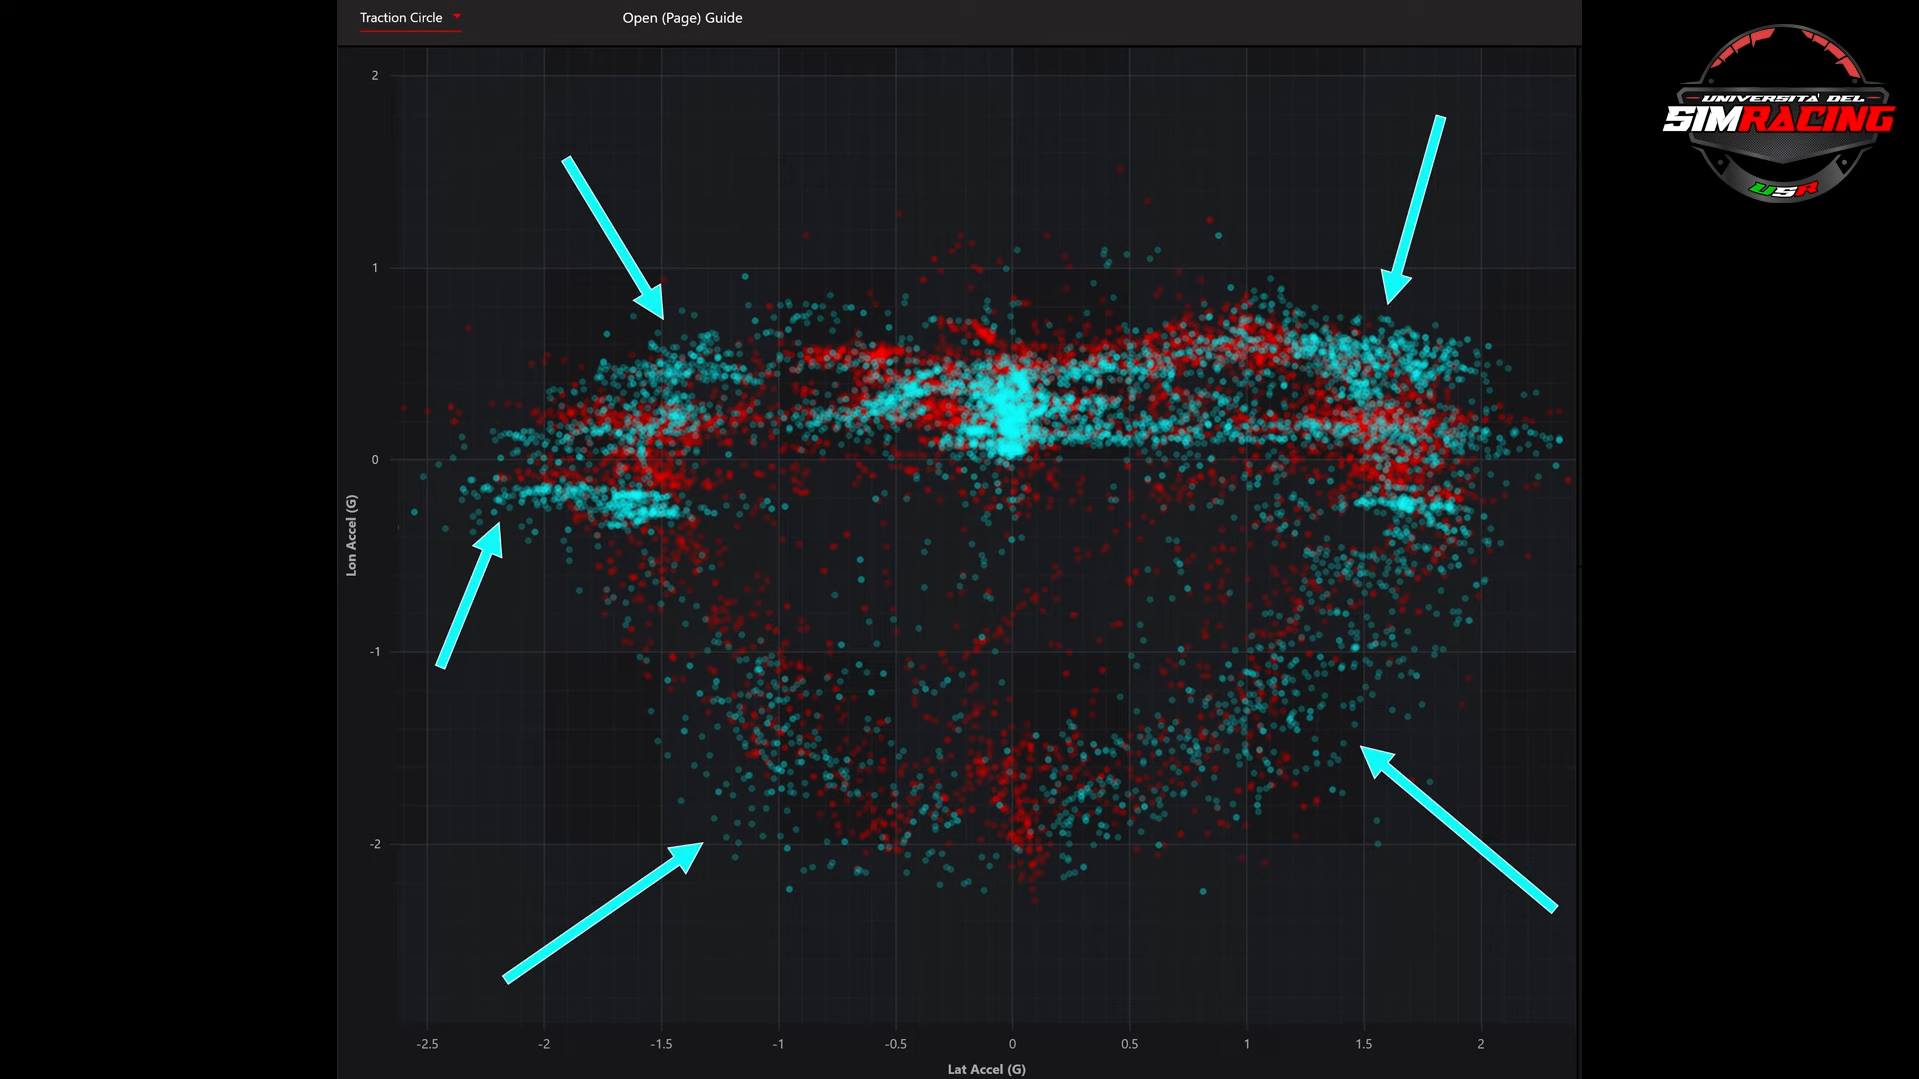
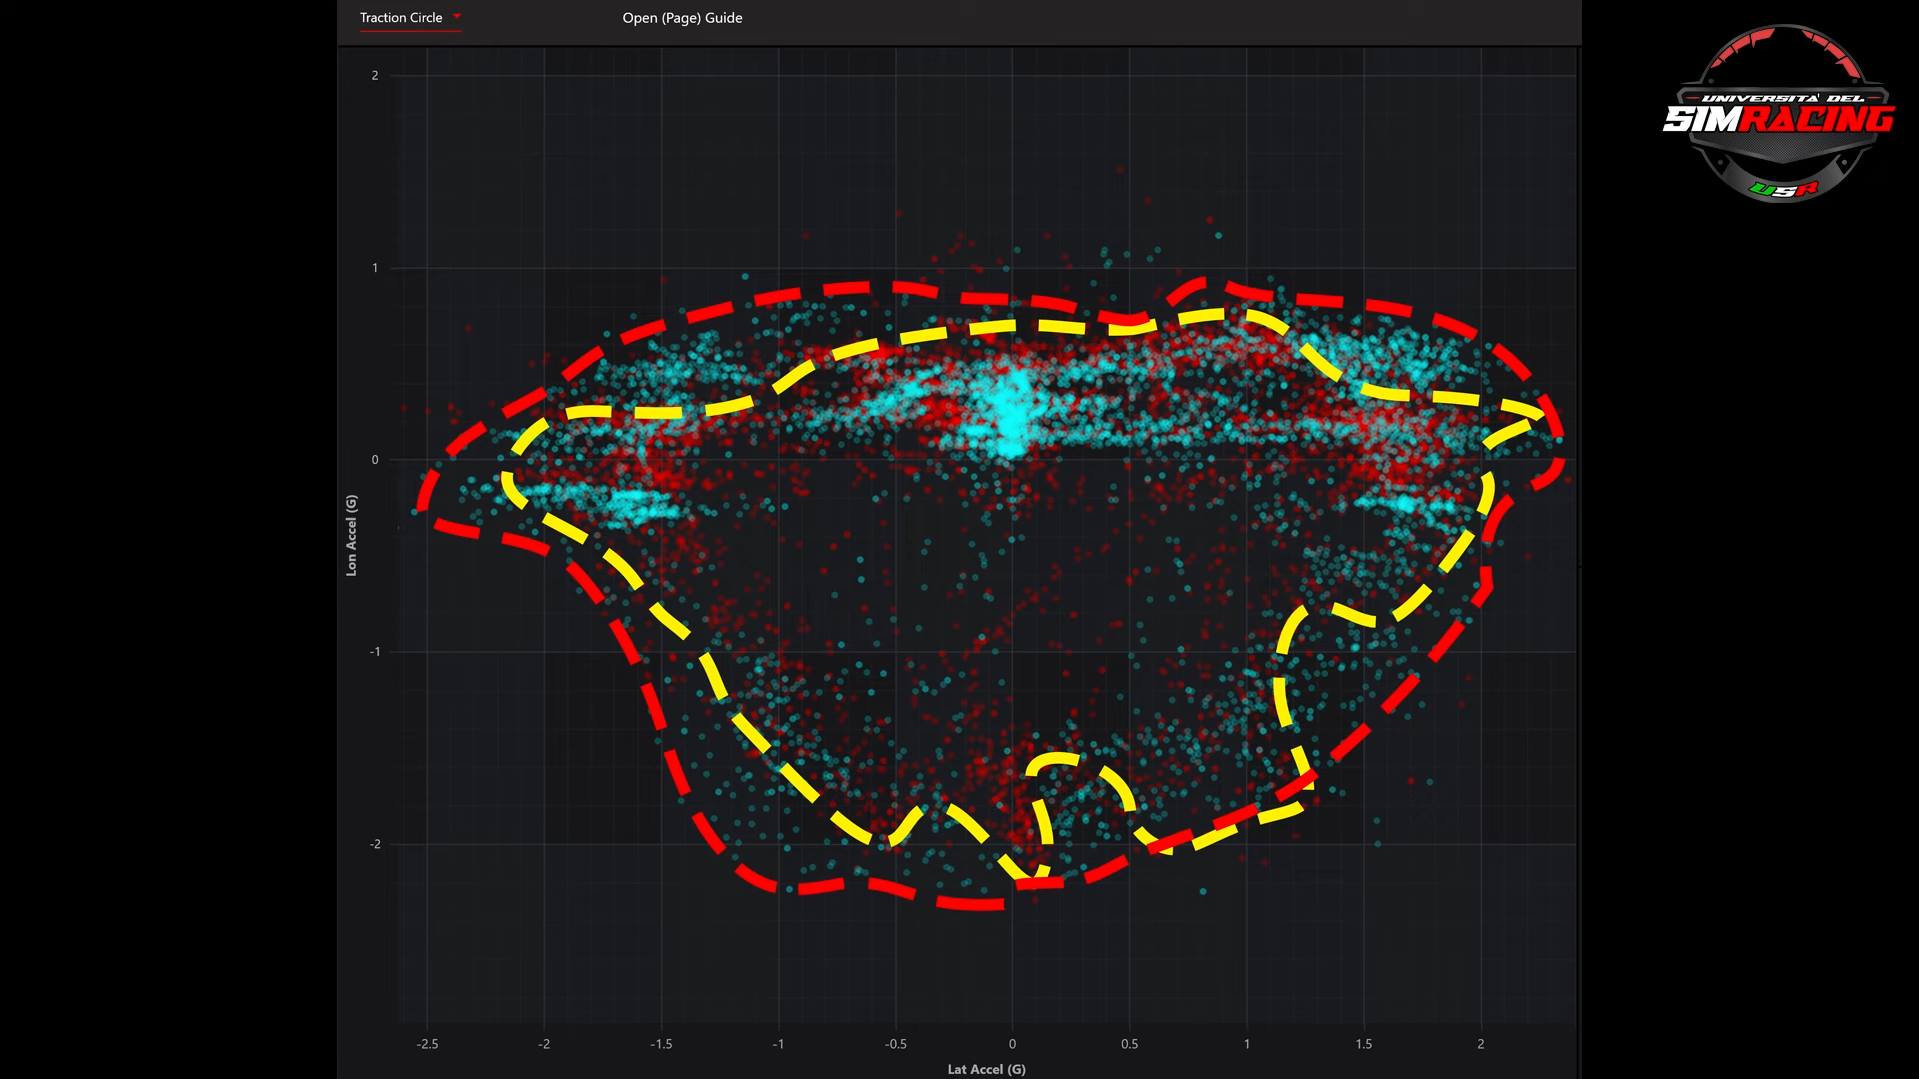
Thanks to telemetry, we can compare the Grip Circle of two laps on the Nürburgring track with the Porsche 991 GT3 in Assetto Corsa Competizione.
As you can see, the faster driver, whose data is colored in light blue, has a much larger Grip Circle than the other driver, whose data is colored in red.
If we trace the edges, we clearly see, recalling the earlier example, that the slower driver left behind many tenths, if not seconds, on the lap time.
As he wasn’t able to fully exploit all the available grip of the tire both in combined acceleration and in Trail Braking.
Clearly, compared to theory, the circle has an actual shape that varies slightly from car to car.
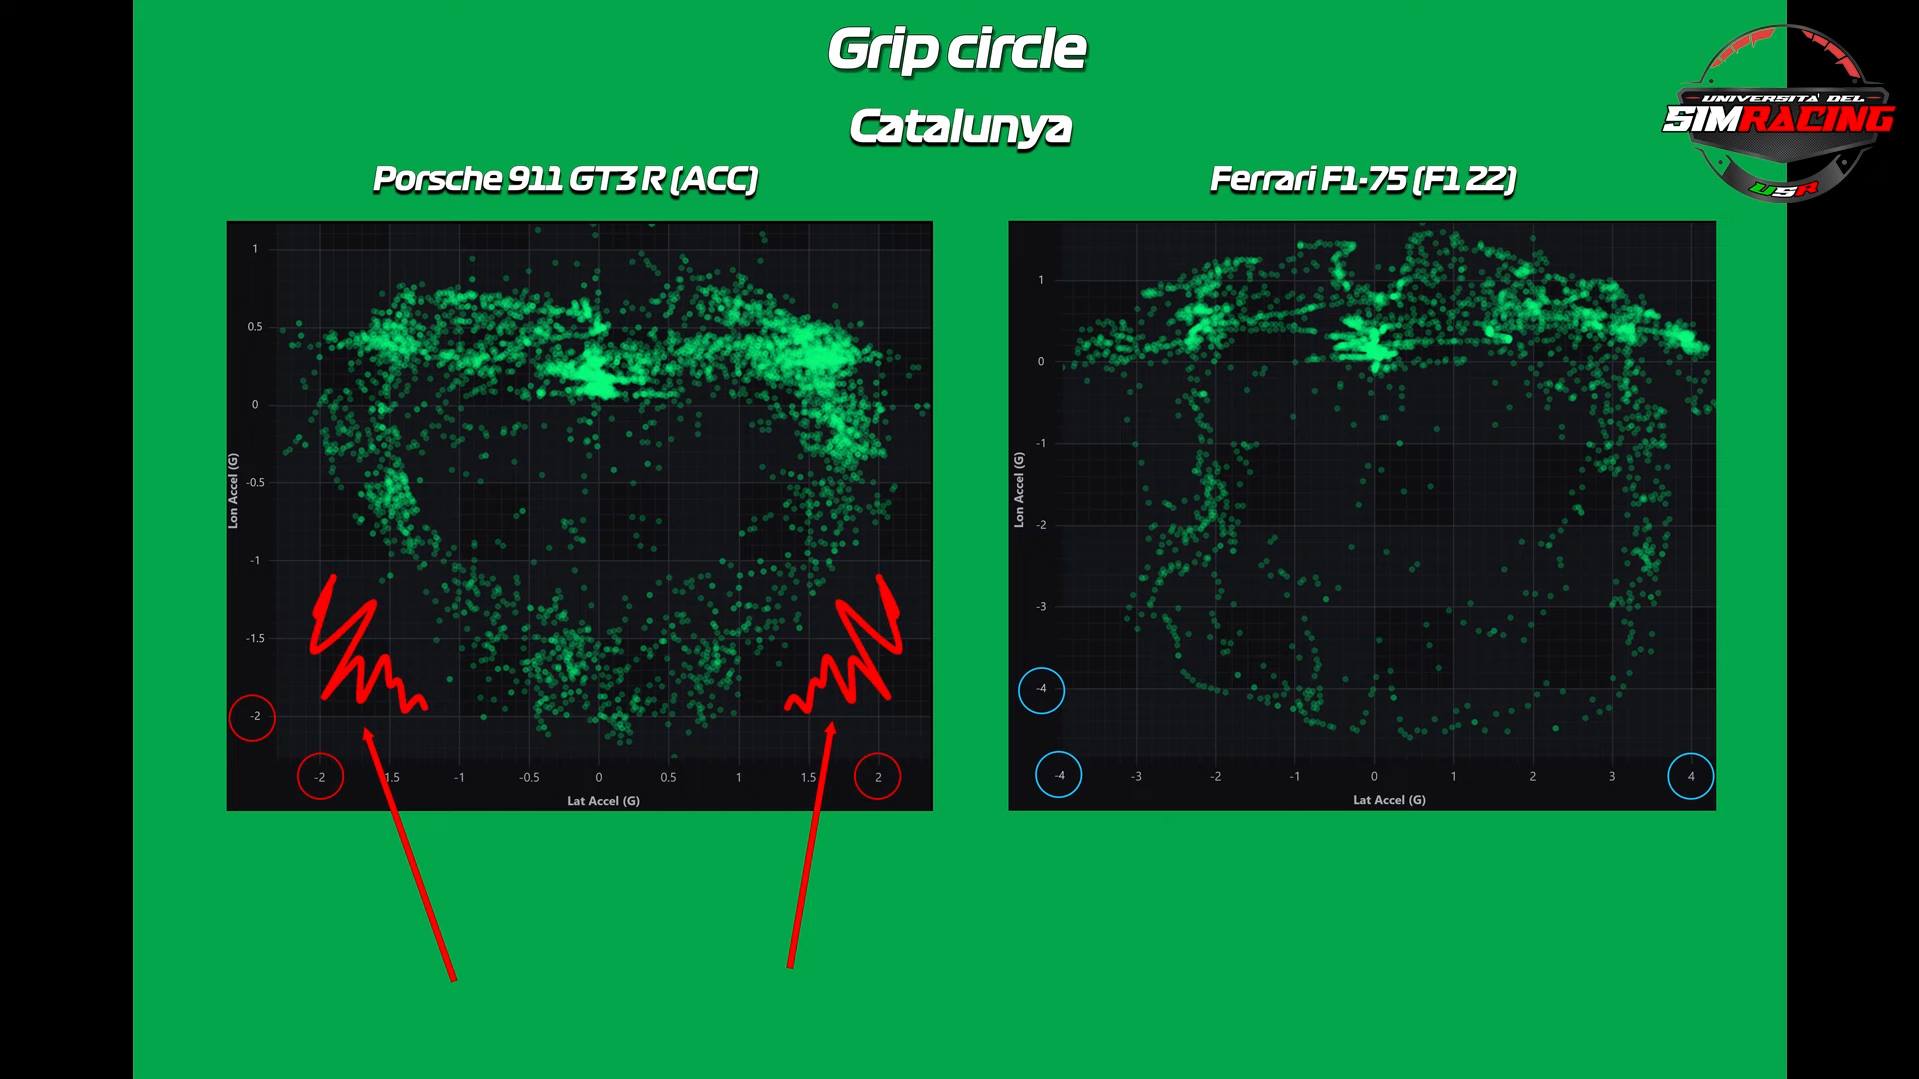
The Grip Circle of a Formula 1 car will, of course, be different from that of a GT3 car and so on...
...producing in any case a Grip Circle slightly flattened on the upper part, as the highest longitudinal G-forces are always reached in braking and not in acceleration.
In any case, the top driver will always operate at the limit of the Grip Circle, because using the maximum available grip translates automatically into lower lap times.
The secret of the Grip Circle lies precisely in the gradual and balanced overlap of braking, steering, and acceleration.
If you do all the braking before you start turning, not only do you waste a lot of the tire's grip potential, but your driving will also be slower.
It’s crucial to drive at the limit, combining and balancing braking, steering, and acceleration to fully utilize the tire’s traction on the edge of the Grip Circle.
This is what leads to faster lap times.
Remember that tires have a grip limit.
So, if you’re using 100% of their traction force in a corner, you can’t allocate even 1% to acceleration.
If you’re using all the grip for braking, you can’t expect to use it in a corner without first reducing the braking.
If you’re using all the grip in a corner, you can’t use any more for acceleration until you start releasing the brakes or reducing the steering by straightening the wheel.
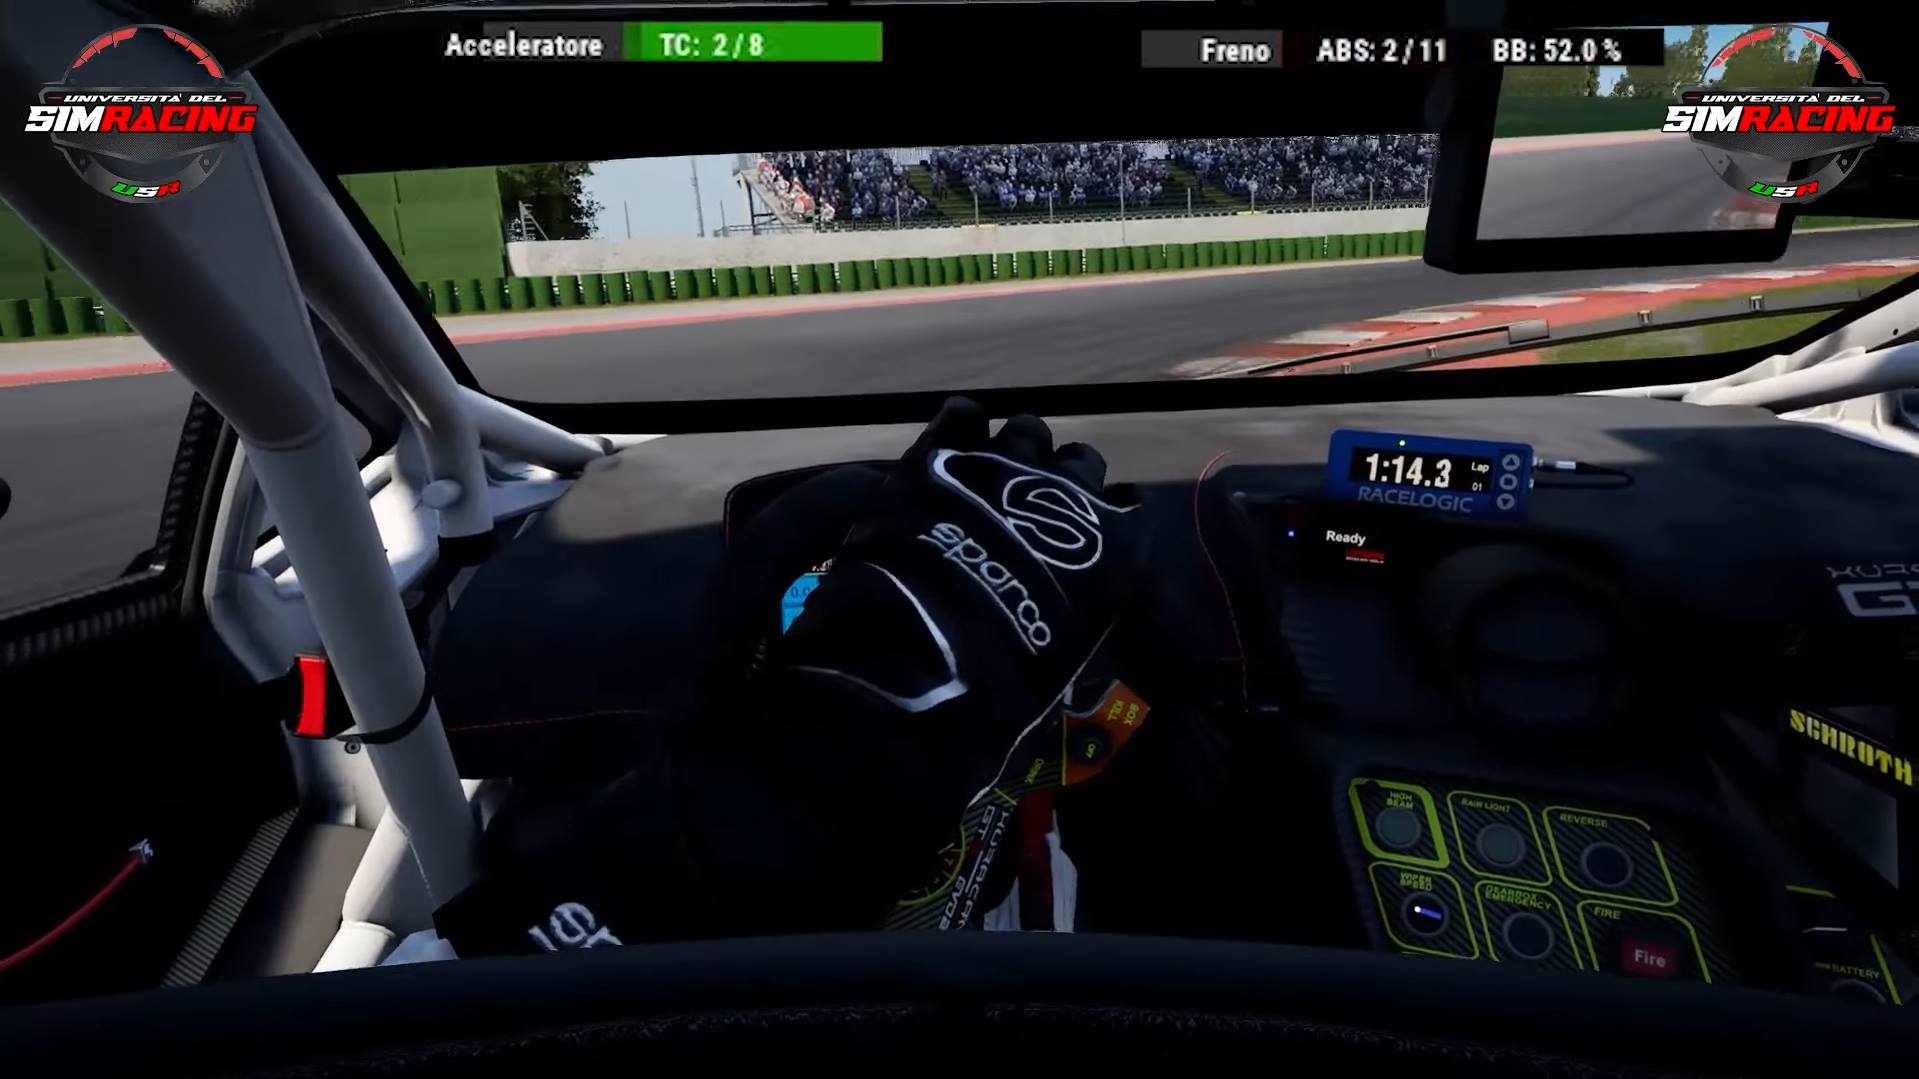
A tip to keep in mind this essential interaction between acceleration, braking, and steering is to imagine that the accelerator and brake pedals are connected to the steering wheel.
The greater the steering angle, the less pressure should be on the brake and accelerator pedals.
Conversely, more pressure on the pedals implies a smaller steering angle.
Too much steering angle combined with too much pressure on the pedal will push the tires beyond their traction limits...
....usually at the front or rear, causing understeer or oversteer.
This can lead to the mistaken belief that there’s a balance issue in the setup, when in most cases, it’s actually the driving technique that is demanding too much from the front or rear tires, pushing them beyond their structural limits.
The Grip Circle shows just this, that the key to driving fast is balancing the application of the pedals with the steering angle.
If you learn how to overlap braking, steering, and acceleration, you too will be able to drive at the limit.
Well, we’ve reached the end of this in-depth exploration.
Continue reading our blog posts by clicking the button below:
See you soon!

